Settings
Tools
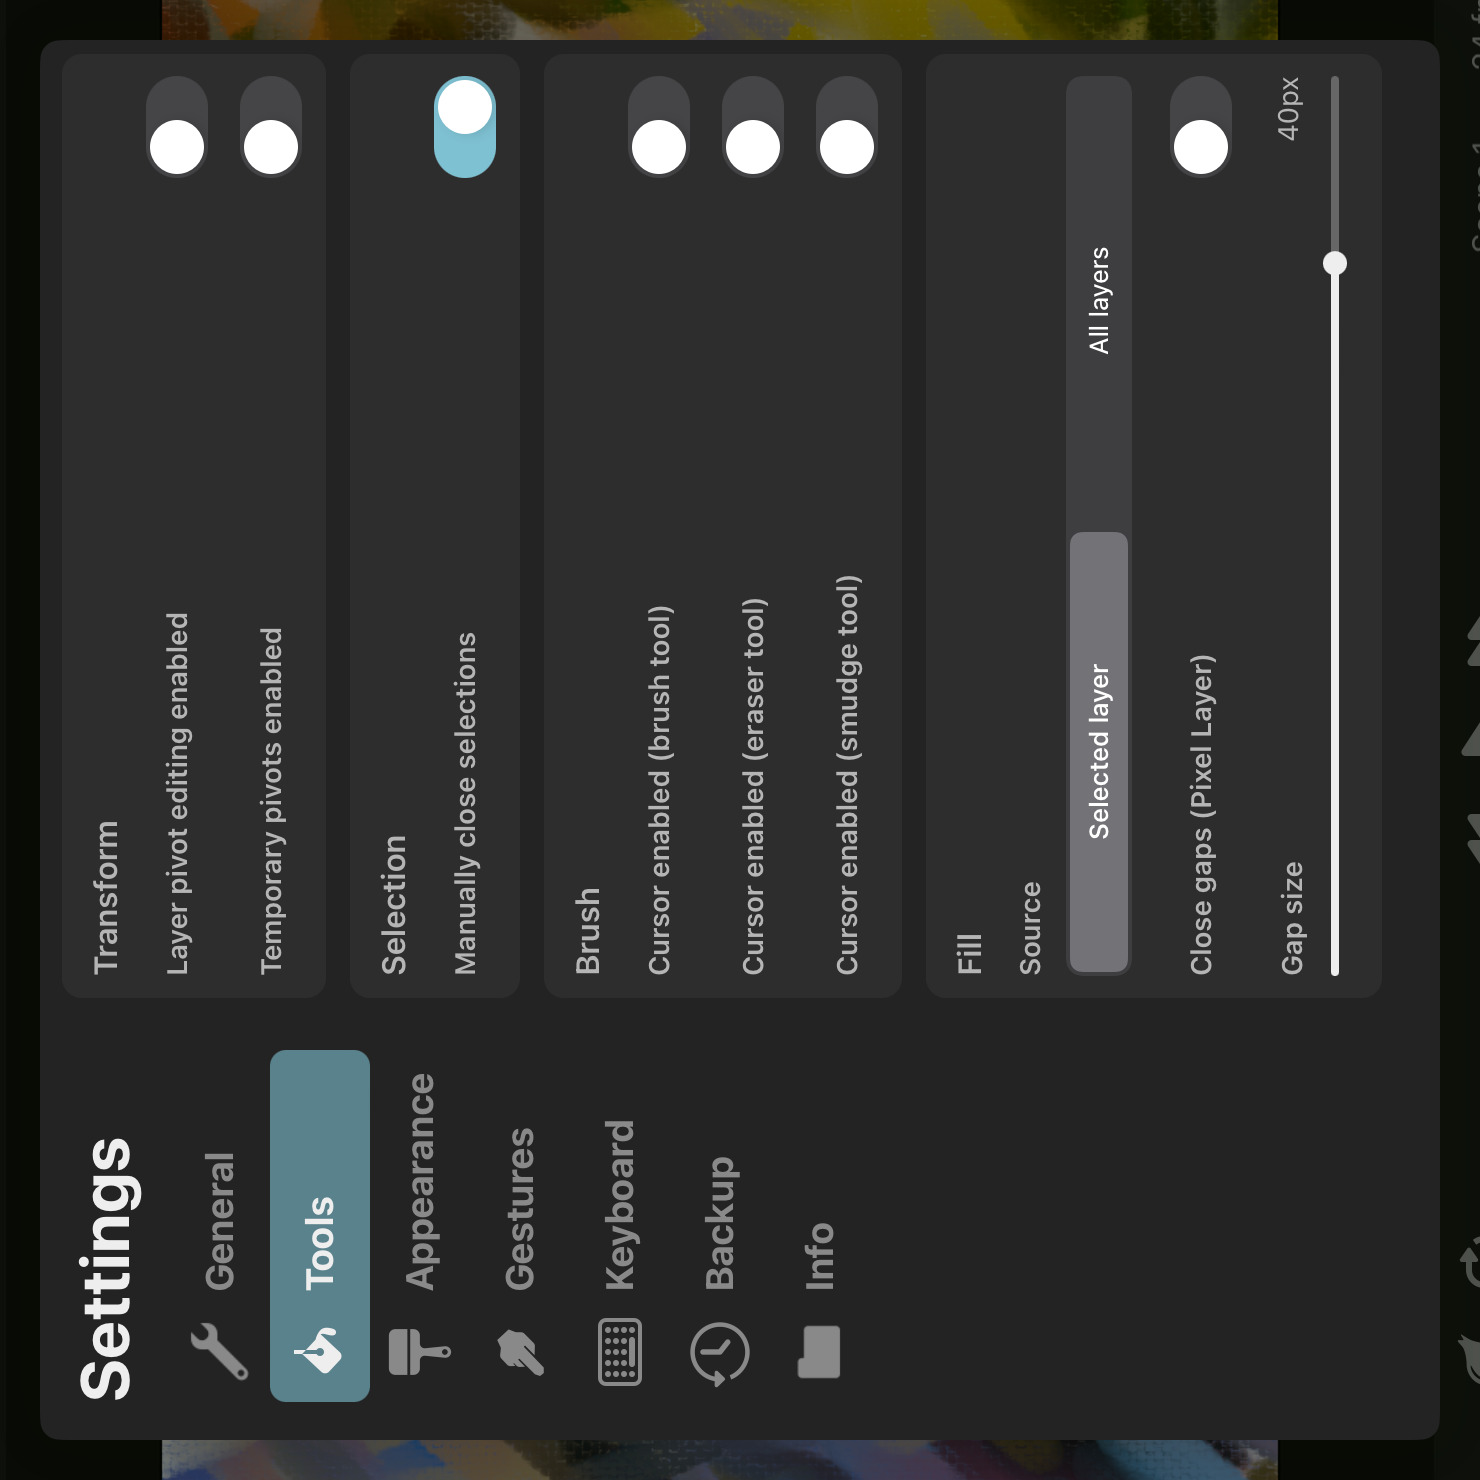
This tab is where you can find advanced settings for the various tools in ToonSquid.
Transform#
Layer Pivot Editing Enabled#
Whether the layer pivot should be editable in the transform tool.
Temporary Pivots Enabled#
Whether the transform tool should show a temporary pivot when you are not editing a layer's transform properties, e.g. when editing the pixels within a pixel layer. This temporary pivot is used to define the center of rotation and scaling for the transform tool.
When this setting is disabled, rotation will always be performed around the center of the selected region and scaling will always be performed around the opposite handle of the one being dragged.
Show Motion Path#
Whether the layer's motion path should be displayed in the transform tool when the layer has position keyframes.
Quick Selection with Second Button Tap#
Whether a second tap on the transform tool button should create a selection area covering all contents of the selected layer.
Automatic Pixel Edit Mode Switching#
Whether the transform tool should try to automatically determine whether to edit a selected pixel layer's pixel contents instead of its transform.
When drawing on pixel layers, you often want to shift, scale, rotate or distort the pixels within the layer instead of moving the whole pixel layer including its entire drawable region. Other times - for example when keyframing or building rigs using the transform hierarchy - you need to edit the layer transform instead of its pixel contents.
This settings tries to automatically determine which transform editing mode you want to use based on the current context.
If there is an active selection area, the tool will always edit the pixels within the selection area.
If there is no selection area and this setting is enabled, the tool will edit the pixel contents, unless either of the following is the case:
- Keyframing mode is currently enabled.
- The pixel layer already has transform keyframes.
- The pixel layer has a perspective or warp effect applied.
- The animation layer is part of a transform hierarchy.
If this setting is disabled, you have to create a selection area to edit the pixel contents of a pixel layer. Otherwise, the tool will edit the layer's transform properties, just like with any other layer type.
Selection#
Manually Close Selections#
By default, when you create freehand selections in the selection tool you have to manually tap the start point of the open selection region to close it.
If you disable this setting, selection regions are closed automatically once you lift your finger or Apple Pencil off the screen.
Brush#
Cursor Enabled#
You can enable these options in order for the brush, eraser and smudge tools to show the outline of the tip of your brush.
Cursor Hover Preview#
Whether the brush, eraser and smudge tools should show a preview of the brush tip when hovering over the canvas with Apple Pencil.
Note
Hover features are only available on iPadOS 16.1 or later and require a compatible Apple Pencil and iPad model with hover support.
Only Erase Selected Path Layers#
By default, the vector eraser erases from all path layers in a vector group when a path layer inside the group is selected. If you enable this setting, the eraser will only erase from the selected path layer.
Only Smudge Selected Path Layers#
By default, the vector smudge tool smudges all path layers in a vector group when a path layer inside the group is selected. If you enable this setting, the smudge tool will only smudge the selected path layer.
Merge Vector Brush Strokes If Possible#
Whether vector brush strokes should be automatically merged into the contents of an existing path layer in the vector groups or the existing shapes in a vector layer. If this setting is disabled, each brush stroke results in a separate path layer in the vector group / a separate shape in the vector layer.
Since a path layer only has a single set of fill and stroke properties, this automatic merge is only possible if the brush stroke uses the same fill and stroke properties as the existing path layer. If it doesn't, the new stroke will be placed in a separate layer.
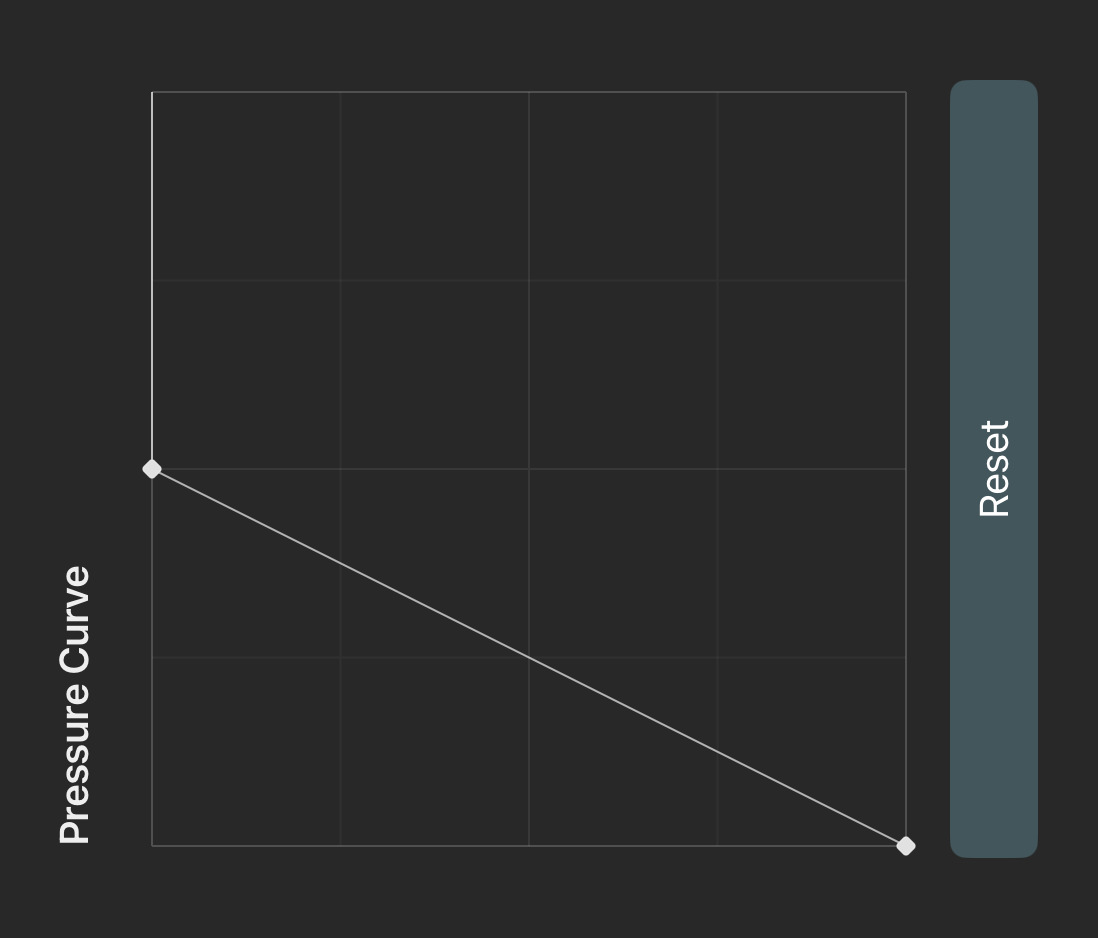
Pressure Curve#
You can adjust the pressure curve to customize how the amount of force you apply with your Apple Pencil affects pressure-sensitive brush settings while drawing. The horizontal axis represents the force applied to the Apple Pencil, while the vertical axis represents the resulting pressure value of the brush.
By default, the pressure curve is a straight line which simply forwards the Apple Pencil pressure values directly to the brush without modification. You can either drag to edit the existing two control points or touch and drag somewhere else on the curve to insert and start editing a new control point.
When there are more than two control points, a control point can be deleted by tapping on it and then selecting Delete . You can also press the Reset button at any time to reset the curve back to its default state.
Example
If you would like to apply less force with your Apple Pencil to achieve the maximum brush pressure control, you can grab the top right control point of the pressure curve and drag it towards the left.
Minimum Smoothing#
The minimum amount of smoothing that should be applied to brush strokes drawn with all brushes, regardless of whether the individual brush's smoothing intensity setting is lower.
Override Smoothing Settings#
Whether the Show Gap, Catch Up When Stroke Ends and Adjust With Speed smoothing settings of all individual brushes should be ignored in favor of using the following global smoothing settings for all brushes.
Show Smoothing Gap#
The value of the Show Gap smoothing setting to be used for all brushes.
Catch Up When Stroke Ends#
The value of the Catch Up When Stroke Ends smoothing setting to be used for all brushes.
Adjust With Speed#
The value of the Adjust With Speed smoothing setting to be used for all brushes.
Fill#
Source#
The source setting of the fill tool controls which layer contents should define the limits of the fill region.
Note that this setting is ignored if you have manually selected a reference layer.
Selected Layer#
The fill region limits are only defined by the contents of the selected layer.
All Layers#
The fill region limits are defined by the contents of all layers on the current frame.
Pixel Fill#
The following are fill tool settings that only apply when filling pixel layers.
Expand#
The amount of pixels by which the edge of the filled region should be automatically expanded outwards. This can be useful for preventing thin gaps from appearing around the filled area when a higher threshold value cannot be used or when dealing with very textured or very soft line art.
Blend Mode#
Defines how the filled region is blended with the existing colors in the layer.
Automatic#
The fill tool automatically chooses the best blend mode based on the region being filled. If the filled region is completely transparent, the fill tool uses the Behind blend mode to blend the fill underneath the edge of the surrounding line art. If the region being filled is not transparent, the fill tool uses the In Front blend mode to keep the fill color visible on top of the existing colors.
In Front#
The filled region is blended on top of the existing colors in the layer.
Behind#
The filled region is blended underneath the existing colors in the layer.
Erase#
The filled region is used to erase the existing colors in the layer.
Anti-Aliasing#
Whether anti-aliasing should be applied to smoothen the edges of the filled region. When this is disabled, the filled region will have a hard edge.
Blur#
The amount by which the filled region should be blurred before being applied to the layer. This can be useful when you want to achieve a soft blend between the fill region and an existing boundary that has a soft edge or is not fully opaque.
Smart Recolor#
When enabled, the fill tool will preserve the existing opacity of the filled region and only change its color by smoothly replacing the previous colors of the region with the new fill color, rather than simply painting over the existing colors with the new fill.
This setting has no effect if the region being filled was previously transparent or if the fill blend mode is set to Behind or Erase.
Close Gaps#
When this setting is enabled, the fill tool will try to prevent the fill color from leaking out of small gaps in your line art.
Gap closing is currently only supported when filling pixel layers, not when filling path layers. It can also lead to lower quality fills under certain circumstances and has a noticeable performance cost for larger gap sizes, so it is recommended to only temporarily enable this option when really necessary.
Gap Size#
If gap closing is enabled, this setting defines the maximum size of gaps that will be closed automatically.
Vector Fill#
The following are fill tool settings that only apply when filling vector groups or vector layers.
Vector Fill Mode#
Controls how the fill tool should behave when you tap on an existing path layer in a vector group or a shape in a vector layer. (The explanations below describe the behaviour when working with vector groups containing individual path layers but they apply equivalently to the individual vector shapes inside of vector layers.)
Tapping in a gap between path layers will always create a new path layer with the fill shape.
Recolor Connected Shapes#
The fill tool will recolor the tapped layer and all other overlapping path layers that have the same color as the tapped layer. Overlapping path layers with a different color do not stop the fill.
Recolor Tapped Shape#
The fill tool will only recolor the tapped layer. Overlapping path layers with a different color do not stop the fill.
Add New Shapes#
The fill tool will always create a new path layer with the fill region shape, even if the shape is exactly the same as that of the tapped path layer. Overlapping path layers with a different color form boundaries for the fill region, in the same way as when filling an empty region or when filling pixel layers.
Merge New Shapes If Possible#
Whether the fill tool should try to automatically merge new fill vector shapes into an existing path layer / vector shape when filling a region of a vector group / vector layer. If this setting is disabled, each new fill shape results in a separate path layer.
Since a path layer only has a single set of fill and stroke properties, this automatic merge is only possible if the fill shape uses the same fill and stroke properties as the existing path layer. If it doesn't, the new shape will be placed in a separate layer.
Path#
Add Subpaths in Freehand Mode#
Whether the path tool should create new subpaths in the selected layer if the existing subpath is closed and you try to add a new control point in freehand mode. If this is disabled, the tool creates a new path layer for the new control point.
Create Vector Groups#
Whether the path tool and the shape library should automatically create a vector group when adding a new path layer.
Bones#
Select the Closest Bone When Dragging#
Whether touching and dragging on the canvas with the Transform Bones Tool selected should automatically select the closest bone to the touch position. When disabled, you have to manually tap to select a bone before you can edit its position, rotation or scale.
This can be very useful for quickly animating a rig with multiple bones, as you can drag the bones directly without having to manually select them first. However, this behaviour can also get in the way if your rig contains many small or overlapping bones, causing other bones to get selected unintentionally when you just want to edit the already selected bone.
Color#
The color with which bones that are not selected should be visualized in the bone tools.
Selected Color#
The color with which selected bones should be visualized in the bone tools.
No search results