Interface
Timeline
The timeline is where you see and edit the different parts of your animation over time and is therefore essential to every animation workflow.

Expand and Collapse#
You expand the timeline with the button in the bottom-right corner with the eject icon. Tapping the button again when the timeline is expanded collapses it again so that you have more space to work on your animation on the canvas.
The timeline height automatically grows as you add more layers to your animation. Once there are more than four layers, the timeline stops growing and lets you scroll through your layers instead.
Custom Timeline Height#
You can manually change the timeline height to see more or fewer layers at once by touching and holding the playback toolbar and dragging it up or down. If you want to go back to the default height, just tap the playback toolbar once and choose the Reset Timeline Height to Default option that appears.
Playback Toolbar#

The playback toolbar sits at the top of the timeline and always stays visible, even when the timeline is collapsed.
Next / Previous Frame#

Use the two buttons on the far left of the playback toolbar to move to the next or previous frame in the timeline.
In the settings you can also change this behaviour to instead move to the next or previous drawings in the selected layer.
Effects (FX)#

Use the FX button to view your animation with or without effects in the editor. This button is only visible if the current scene contains any effects.
Many tools (e.g. the brush tool or the selection tool) automatically disable effects when you switch to them, since they edit the state of the layer contents before effects are applied to them.
Certain tools such as the transform bones tool or the transform mesh tool behave differently depending on whether effects are enabled or not. You can find more details about this on the corresponding handbook pages.
Onion Skin#

Toggles onion skinning on and off, allowing you to see the contents of the previous and next drawings. Hold the button for more options. The Onion Skinning feature and the available options are covered in detail on this page.
Loop#
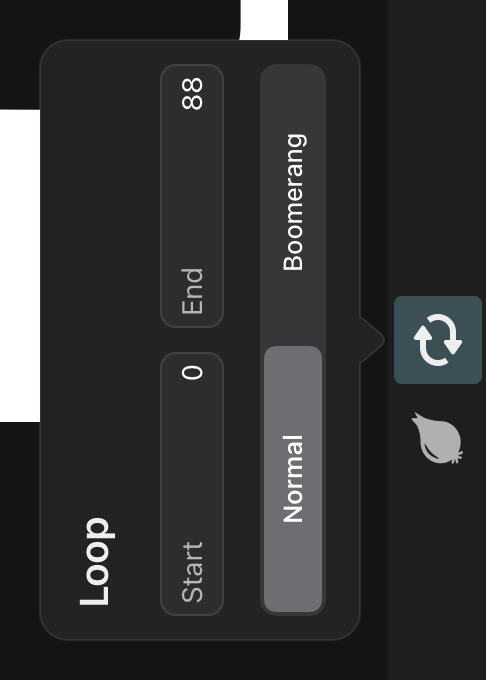
Toggles looped playback on and off. When looping is enabled, playback of your animation in the editor will continue when the last frame of the animation is reached. This does not affect the export. Hold the button for more options.
By default, the entire animation will play in a loop. You can change the range of the loop in the Loop options or tap the selected frame number in the timeline and set it as the start or end frame of the loop.
When looping is enabled, there are the following two modes.
Normal
Once playback reaches the last frame, it continues from the first frame of the loop again.
Boomerang
Once playback reaches the last frame, the animation starts playing in reverse until the first frame of the loop is reached. Then it switches back to forward playback and the cycle repeats.
During the reverse playback phase, the audio playback is muted.
Fast-Forward / Fast-Backward#


You can use the fast-forward and fast-backward buttons to quickly navigate to the beginning and end of the animation in the timeline. If looping is enabled, tapping the buttons once takes you to the start or end of the loop region first before then jumping to the start or end of the animation with the second tap.
Play and Pause#
Use the play button to start the playback of your animation in the editor. During playback, the button turns into a pause button which you can use to stop the playback on the current frame.
Scene Selection#
To the right of the playback buttons the playback toolbar shows the name of the scene or clip that is currently open in the editor. Tap the name to select a different scene. More information on scene management can be found here.
FPS#
The playback frame rate of the current animation is displayed next to the scene name. Tap it to bring up a slider that you can use to choose a different frame rate between 1 and 60 frames per second.
If a scene is selected, this changes the FPS of all scenes. If an animation clip is selected, only the FPS of that clip will be changed.
Tip#
Keep in mind that the frame rate is typically something you decide at the very beginning and then never change, because it affects the timing of your animation. If you have audio layers in the animation, they will go out-of-sync with the visuals if you change the FPS.
Layers#
The timeline shows you the layers that make up your animation in the layer list on the left.
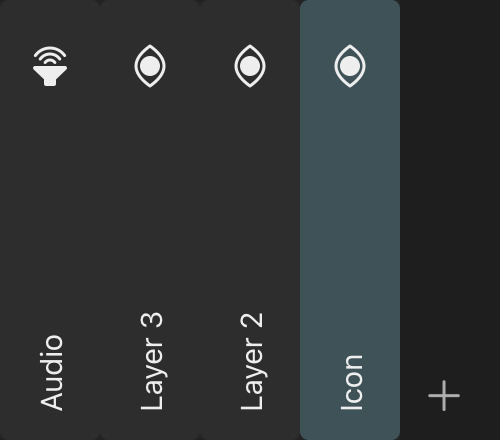
Tap the + button in the bottom left corner to add a new layer to the animation.
Frames#

Frames are the different points in time of an animation. The frame rate defines how many frames of the animation are shown during each second of playback.
The timeline shows the frame numbers to the right of the layer list with a play cursor on the currently selected frame. You can either tap a different frame or drag the play cursor to change the selected frame.
The canvas will show the contents of your animation on this frame.
Drawings#
Drawings are used to show different contents in an animation layer for different periods of time. Learn all about how layers and drawings are used in ToonSquid in the Layers chapter.

You can see all the drawings in the different animation layers to the right of the layer list and below the frame numbers in the timeline.
The selected drawings are highlighted and show retiming handles on the sides.
Retiming Handles#
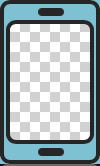
Drag the retiming handles on the left and right edge of the selected drawing to change the first and last frame on which this drawing should be shown.
Note that dragging the right retiming handle only changes the duration of your drawing, whereas dragging the left handle changes both the duration and the start frame of the drawing. This might not make a difference if your drawing only has static content, but if the drawing layers inside have multiple keyframes or contain a symbol, this affects the animation. Keyframes start on the first frame of the drawing, so they will all be shifted when this first frame changes. It is therefore not possible to trim the start of a drawing in the same way that you can with the end of a drawing.
With multiple drawings selected, dragging the retiming handles of one drawing will edit all selected drawings simultaneously.
Magnetic#
If the magnetic timeline mode is enabled, the next and previous drawings will automatically be shifted back or retimed if necessary when you drag the retiming handles of a neighboring drawing. Drawings without a gap between them will continue to "stick together" when they get retimed.
If you don't want any other drawing to be affected by the retiming of the current drawing, disable the magnetic mode.
Additionally, when the timeline is zoomed out and magnetic mode is enabled, dragging the retiming handles will snap them to the edges of other drawings in the timeline in order to make it easier to align drawings in different layers to each other.
This will also snap the play cursor to the first and last frame of visible drawings when you drag it.
Actions#
Tap the selected drawing again to see further actions that can be performed on this drawing.
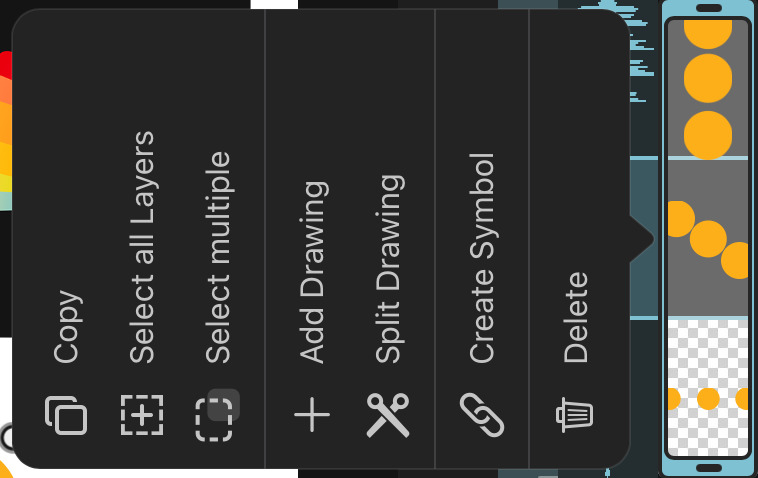
Select All Layers#
Selects all drawing layers in the drawing. (Only shown if the drawing contains multiple layers.)
Select Multiple#
Whether the next touch and drag inside of the timeline should start selecting multiple drawings and keyframes instead of scrolling the timeline. This can be used as a slower but more reliable alternative to the double-tap and drag gesture.
Add Drawing#
Has the same behavior as the Add Drawing button at the bottom of the timeline.
Split Drawing#
Splits the drawing at the selected frame, resulting in two drawings with the same contents. If the drawing contains a symbol layer, its timing will be adjusted to seamlessly continue its playback from the previous into the next drawing.
Keyframes within the new drawing are automatically adjusted to maintain their previous positions in the timeline. Note that depending on the choice of easing curve of the keyframes around the split frame, this can lead to small changes in the animation.
Loop Drawings#
Loops the selected drawings by placing them in a group layer with its loop mode set to Normal. You can also create such a looping group configuration manually with any group layer in the timeline.
This option is only available if you have multiple drawings selected.
Reverse Drawings#
Reverses the order of the drawings in the selected layer.
This option is only available if you have multiple drawings selected and they are all in the same layer.
Create Symbol#
Turns the contents of the drawing into a symbol. Learn more about the power of symbols in ToonSquid in this chapter.
Separate Layers#
Converts the drawing layers inside of the single selected drawing into separate animation layers in the timeline with one drawing layer in each of them.
Clear#
Removes the drawing layers from all selected drawings in the timeline while keeping the timing of the drawings intact.
Delete#
Removes the drawing and all of its content from the animation.
Select multiple drawings#
Double-tap the timeline and drag your finger to create a selection box to select multiple drawings at once.

Alternatively, use the Select Multiple drawing action.
When multiple drawings are selected, just tap somewhere else in the timeline to deselect them again.
Drag and Drop#
Touch and hold a drawing and then start dragging it around in the timeline. You can use this to either move the drawing within the layer that it's already in or to move it to a different layer. You can also use this to quickly move multiple selected drawings at once.
While you are dragging, the timeline shows a preview of where exactly the dragged drawings will be moved to.
Drawings cannot be dropped onto frames that already contain other drawings. If the magnetic timeline mode is enabled, the drawings of a layer will automatically be shifted back and forth to make space for the drawing being dragged.
Bottom Toolbar#
The toolbar at the bottom of the timeline contains various buttons for basic and advanced editing.
Magnetic Mode#

The magnetic timeline mode affects the behavior of the retiming handles and the drag and drop gesture as explained in those sections above.
Transform Hierarchy#

This button opens the transform hierarchy interface, which you use to edit the transform hierarchy of the animation layers.
Keyframing#

Use the button with the keyframe icon to switch the editor in and out of keyframing mode. This is the basis of ToonSquid's powerful keyframing workflow.
By default, keyframes are automatically added if you have the keyframing mode enabled, so make sure that you don't leave this mode enabled unintentionally. Alternatively, disable this behavior in the settings.
Easing Curves#

When keyframing is enabled and a layer property is selected, this button is shown next to the keyframing button. Use this to open up the easing curve editor for the selected keyframe.
Add Drawing#
The Add Drawing button adds a new empty drawing to the timeline at the selected frame.
The exact behavior of this button depends on the content that already exists in the selected layer at the selected frame:
If there is no drawing on the selected frame already, a new drawing is created. The previous drawing is extended to fill the gap between the two.
If there is already a drawing that is longer than one frame, it is split into two parts: The existing drawing, which now ends on the previous frame and a new empty drawing, which starts on the current frame and ends on the frame that the existing drawing previously ended on.
If there is already a drawing that only spans a single frame, then a new drawing is inserted into the layer after the existing drawing. Following drawings are automatically shifted back to make space.
Tip#
You might not need to use this button very often since drawings are automatically added whenever you draw or otherwise add content on a frame without an existing drawing (e.g. using the text or path tools).
You can disable the Split Existing Drawings When Adding New Drawings setting if you prefer new drawings to always be added on the frame after the current drawing ends, instead of the current drawing being shortened.
Duplicate#
Use this button to duplicate the contents of the selected drawing into a new drawing.
If there is no drawing on the selected frame, the previous drawing on the selected layer is duplicated and extended to fill the gap to the current frame.
Existing drawings on the selected frame are split into two and keyframes within the new drawing are automatically adjusted to maintain their previous positions in the timeline. Note that depending on the choice of easing curve of the keyframes around the split frame, this can lead to small changes in the animation.
Extend#
If a drawing is selected, this button will increase the length of that drawing by one frame.
If there is no drawing on the selected frame, the previous drawing on the selected layer is extended to the selected frame.
Tip#
Use this button to quickly set the length of drawings that you want to show for a long time. Add the drawing on the frame on which it should appear, then go to the last frame on which it should be visible and hit "Extend Drawing".
Zoom#
You can pinch your fingers in the timeline to change the zoom level of the timeline. This allows you to see more of your animation at once.
If you zoom out far enough, the timeline will switch to displaying the time in seconds instead of frames. The play cursor will continue to show the current frame number.

Frame Markers#
Frame markers can be used to highlight and add comments to different frames of your animation. In combination with symbol layers, they also allow you to quickly animate the time property of a symbol layer by selecting from the list of markers in the linked clip. This process, which can be very helpful for workflows such as lip-syncing, is described in more detail here.
Add a Frame Marker#
- Select the frame on which you want to add the marker
- Tap the frame number again
- Select
Set Markerfrom the list of options.
The frame markers are shown above their corresponding frame numbers in the timeline.
Edit Frame Markers#
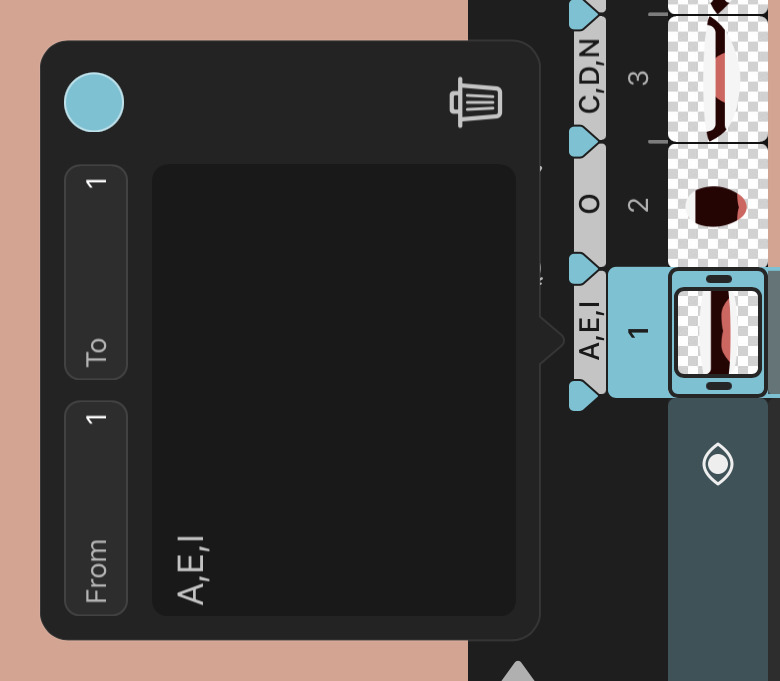
Tapping a frame marker opens a popover in which you can edit the selected marker. You can add a comment to be shown in the timeline, change the color of the marker and change the frames that it applies to with the From and To inputs.
By default, frame markers start and end on a single frame but you can also extend them to apply to multiple frames at once. There can be at most one marker on each frame of the timeline.
Looped Frame Markers#
Frame markers that span multiple frames can be defined as looping by tapping the loop button in the popover. When you now select this marker in a symbol layer, the inserted time keyframes are automatically configured to loop the animation.
Delete Frame Markers#
In order to delete markers from your timeline, either use the delete button in the frame marker editing popover shown above or select a frame with a marker, tap the frame number again and then tap Delete Marker in the list of options.
No search results