Interface
Editor
The editor interface is the workspace where you spend most of your time creating your animation.
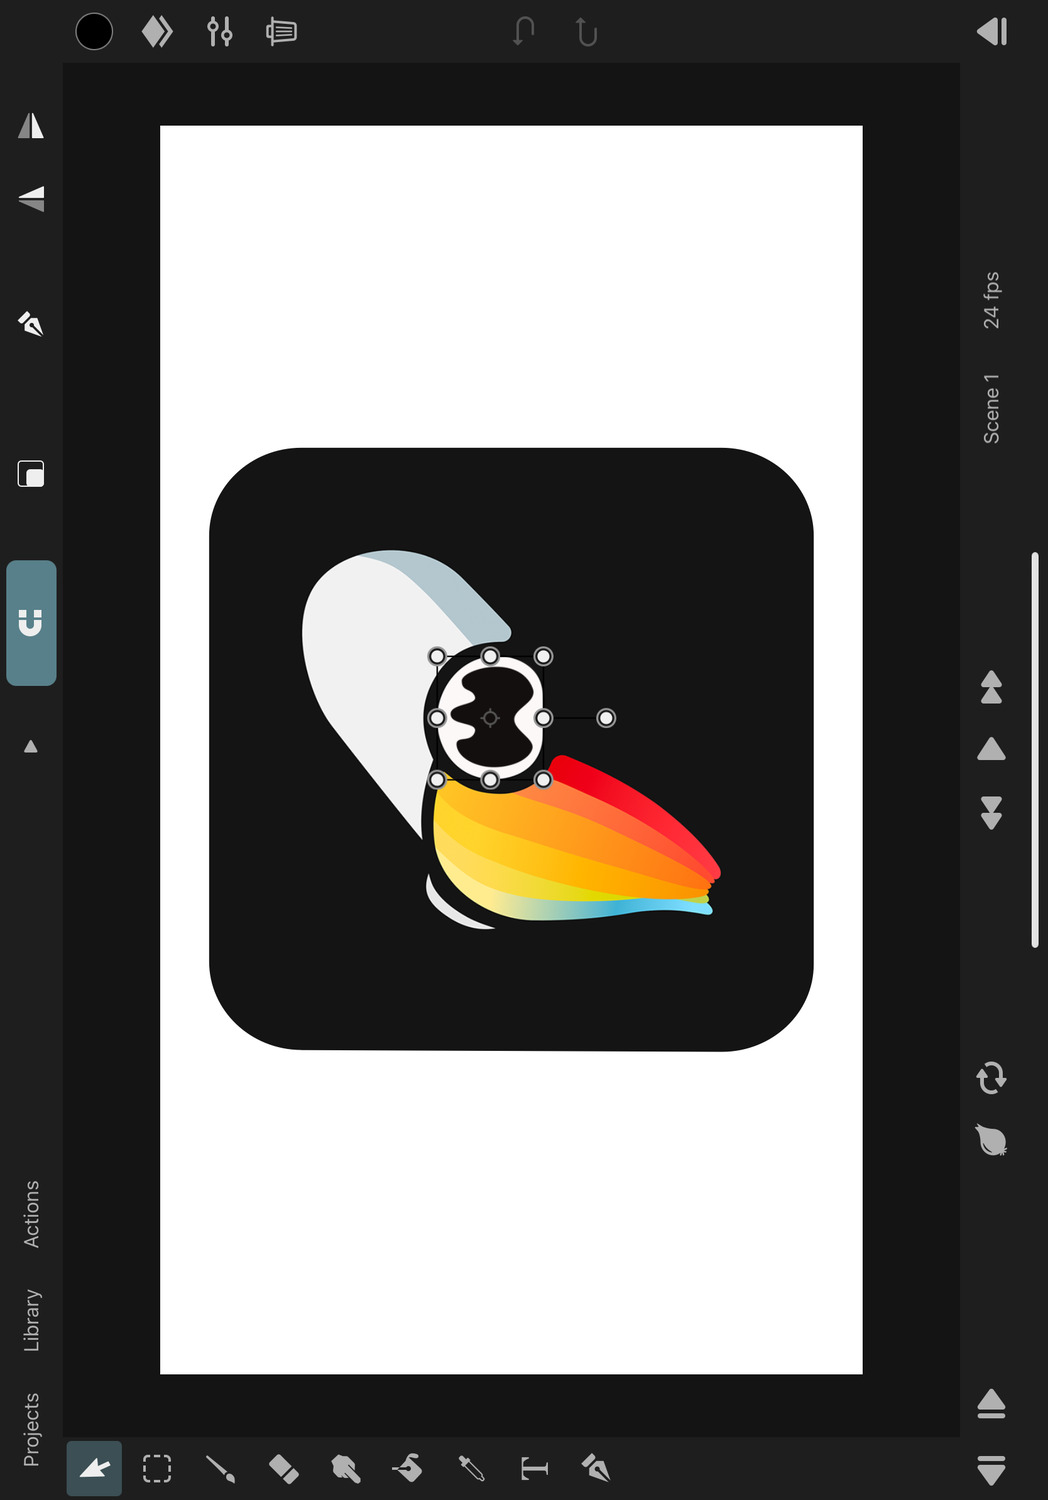
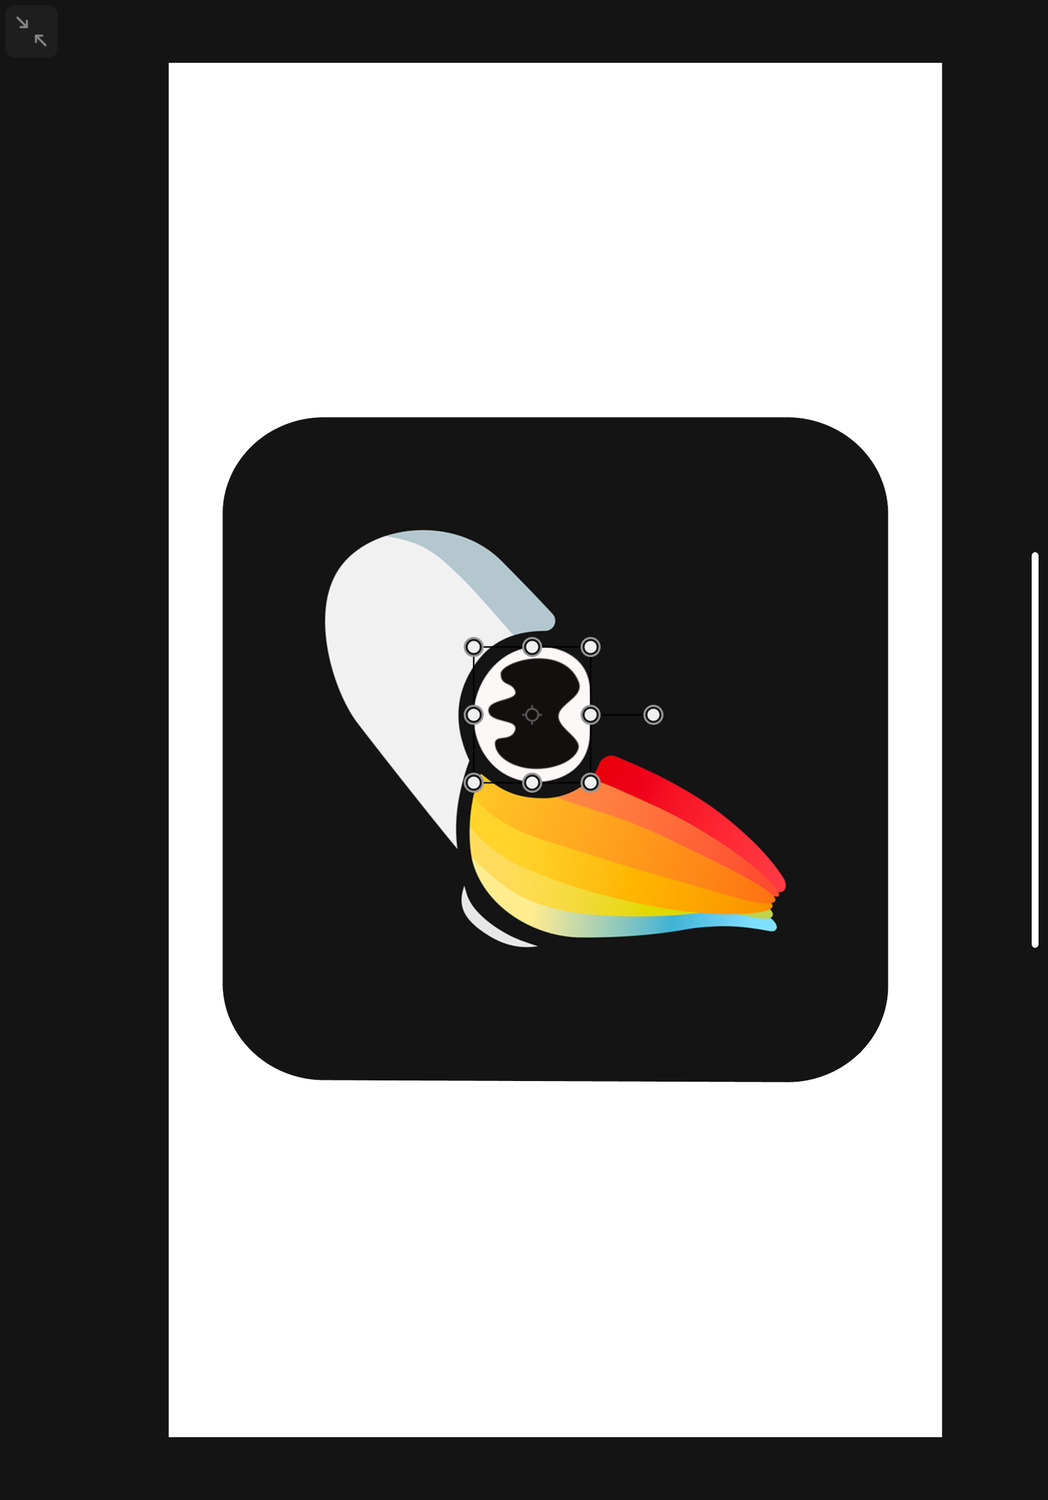
Canvas#
The canvas is the central area of the editor where you can see and edit your animation directly on the screen.
You can navigate the canvas by pinching to zoom and moving your two fingers around to move and rotate the animation on the screen.
Depending on the selected tool, you have different editing options on the canvas for the selected layer. More details on this follow in later chapters.
Tools#
The sidebar on the left contains the list of tools that you can use to edit your animation in different ways on the canvas. These are the tools from top to bottom: transform, selection, brush, eraser, smudge, fill, pipette, text, path.

Select a tool by tapping its icon in the sidebar. After selecting a tool, its name shortly appears at the top of the screen and the icon becomes highlighted.
Some tools (like the brush, eraser and smudge tools and the path tool) allow you to tap their icon again to show more options.
Tip#
Tapping the current selection again to show more options works almost anywhere in the editor interface. You can do it on the selected layer, the selected drawing, the frame number in the timeline etc.
Some tools (like the bone tools or the mesh tools) are only shown in the sidebar when the corresponding effect is selected.
Navigation Buttons#
The three buttons in the top left corner of the editor are used to navigate from the editor to other important screens.
Projects#
Takes you back to the project library where you can select a different project to work on.
Library#
Opens the asset library of the current project. The asset library contains videos and audio clip assets that were imported and animation clips that were created as part of this project. This is also where you can import more assets, such as images. The library interface is covered in more detail on this page
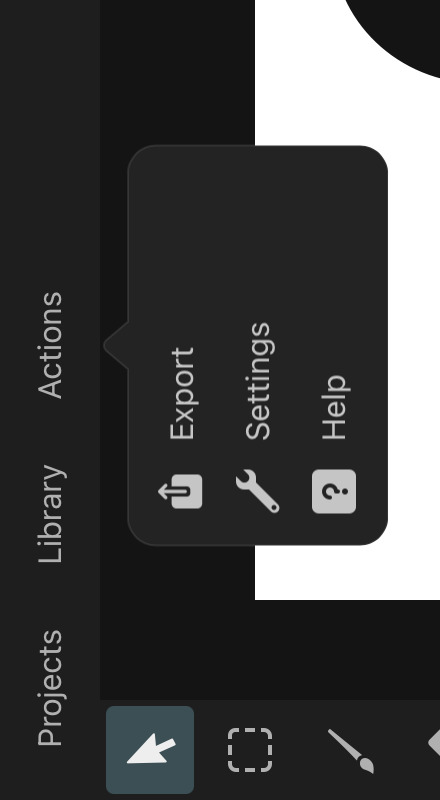
Actions#
The actions button opens a popover with further navigation and action options.
Export#
At some point, you are going to want to export your animation from ToonSquid as a video or image to share with others. This button opens the interface to configure such an export. The exporting process is explained in this chapter.
Settings#
Opens the preferences which you can use to configure the behavior of the ToonSquid editor. All available settings are covered in this chapter.
Help#
Opens a list of various support and informational links. You'll find a quick link to the handbook and one for contacting support, the privacy policy and other legal information if you are ever looking for it.
The help popover also shows you the current app version at the top.
Flip Canvas X & Y#
These buttons allow you to temporarily flip the canvas. This can for example be useful if you want to check your drawing for symmetry errors.
This can also be done via the General settings.
Enable Guides#
This button allows you to quickly enable or disable drawing guides on the canvas.
Enable Ruler#
This button allows you to quickly enable or disable the ruler on the canvas.
Edit Guides#
Opens the drawing guides and ruler settings in the inspector so you can customize them to your needs.
Tool Options#

Options that are specific to the selected tool such as a brush size slider or a button for enabling and disabling snapping are shown in the top bar on the right. The available options are explained on the different pages that present each tool in more detail.
Tip#
Labels for the tool options are hidden by default, but you can tap the little disclosure triangle to the left of them to expand the options and see their labels as well.
Sidebar (Right)#
The sidebar on the right contains buttons for commonly used editor features.

Color Picker#
The color button on the right shows the current editor color, which is used for the brush. Tapping it opens the color picker interface for choosing a different color.
Drawing Layers#
The layers button opens the list of drawing layers of the currently selected drawing. Learn more about these concepts in the Layers chapter.
Inspector#
The inspector shows all properties of the currently selected layer. You can switch between the properties of the selected animation layer and the selected drawing layer at the top.
Different layers have different properties, which are covered in detail in the Layers chapter.
Quick Delete#
If a layer is selected, a delete button (trash icon) is shown below the inspector, which can be used to delete the selected layer. By default, the drawing layer is deleted, but this behavior can be adjusted in the settings.
If this button has been configured to delete the selected drawing layer and there is an active selection area on the canvas, only the selected region of the layer is cleared (as long as the selected layer type supports this).
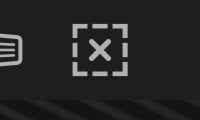
Quick Deselect#
When there is an active selection area in the editor, you can use the deselect button in the right sidebar in order to quickly deselect the current selection no matter which tool you are currently in.
Undo and Redo#
Exploring different ideas and making mistakes is part of everybody's creative process. In ToonSquid you don't have to worry about making mistakes because every edit to your project can be undone. Either tap the screen with two fingers or use the undo button (arrow to the left) in the sidebar. And if you accidentally undo too much, tap with three fingers or use the redo button (arrow to the right) to re-apply the edit.
Undo and redo steps continue to exist until the editor is closed, for example by going back to the project library.
Breadcrumbs#
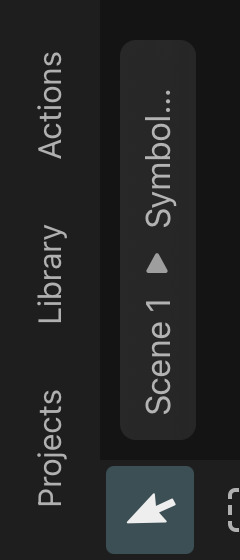
If you open an animation clip in the editor, you can navigate back to the previously edited clip or scene via the breadcrumbs buttons in the top left corner of the canvas.
Fullscreen Mode#
In the top right corner of the editor, you can find the fullscreen mode button. Tap this button to hide all other UI elements and focus only on the canvas. Tap the button again to exit fullscreen mode.
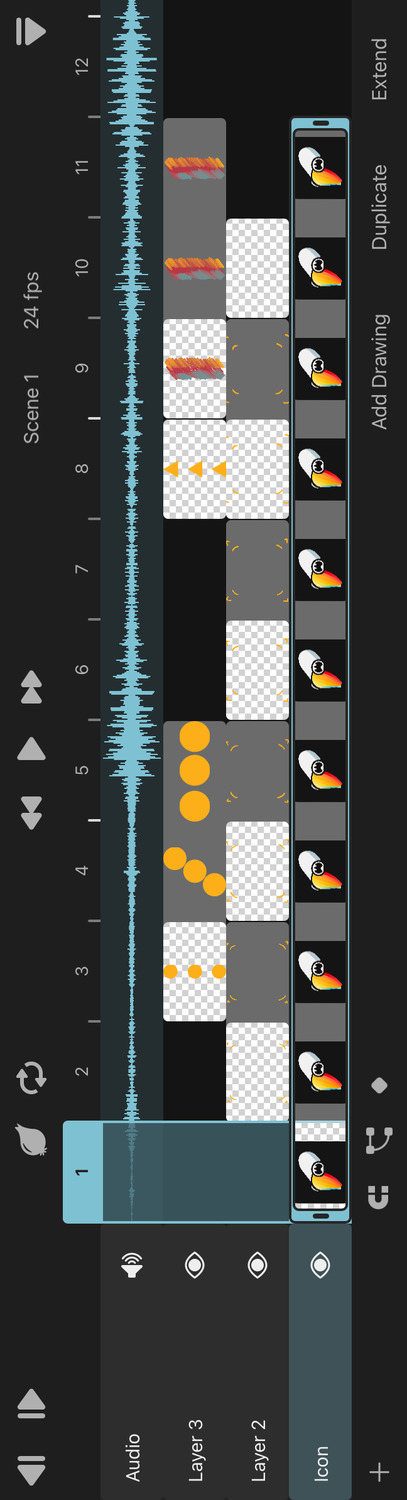
Timeline#
You can find the timeline at the bottom of the screen. It can be expanded and collapsed with the button in the bottom right corner.
The timeline is where you see and edit the different parts of your animation over time. It is essential to any animation workflow and is covered in full detail on the next page.
No search results