Layers
Pixel Layer
Pixel layers are the drawing destination for pixel brushes, which are the most common type of brush in the brush library. They store their contents as a raster image, i.e. in a grid of pixels that can each store a single color.
The resolution of a pixel layer is determined by the scene or animation clip that it is in. Pixel layers with a large resolution result in larger project folder sizes and more system memory usage during editing. You can only draw on a pixel layer within the area defined by this resolution.
Pixel layers are also created when rasterizing vector-based layers.
By default, the transform tool can be used to edit and animate the transform property of the Pixel Layer, just like with any other layer. This moves the entire layer (and with that the area in which you can draw). However, you can also use the transform tool to edit the layer's pixel contents while keeping the transform properties unmodified.
Lock Transparency#
You can lock and unlock the transparency of the pixels via the layer actions. Drawing on a pixel layer with locked transparency will only modify the colors of the pixels but not their opacity.
This means that fully transparent areas of the layer will remain transparent when you move a brush over them. You can use this feature to easily shade the contents of your layers without having to worry about going over your carefully drawn edges.
The brush, smudge and fill tools all respect the "Lock Transparency" option. You can still edit the pixels without any limitations using the transform tool, even with this option enabled. You can also still use the eraser on such a layer. If you want to prevent both of these types of edits, you can use the lock option instead.
Tip#
You can also set the transparency lock on an animation layer, which then automatically applies to all pixel layers in all drawings of that animation layer.
Images#
When you import raster images, they are rasterized into pixel layers in a separate, automatically created animation clip.
SVGs are imported as vector groups.
Adding Images#
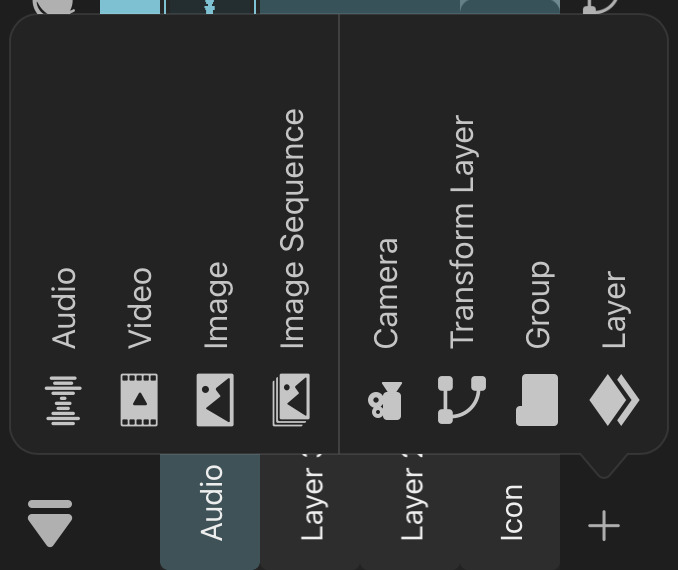
You can import an image into the timeline by tapping the + button in the timeline and selecting Image.
Alternatively, you can also import images into your project via the library with these steps:
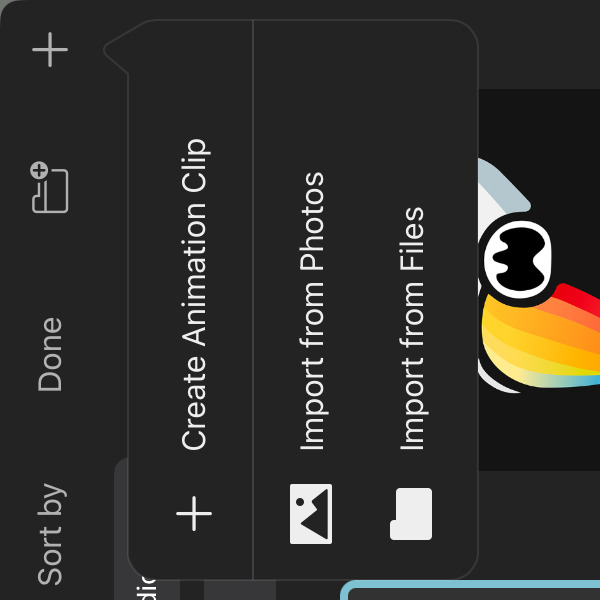
- Open the library.
- Tap the
+button in the top right corner. - Tap
Import from FilesorImport from Photos. - Select one or more images.
For raster images, this will
- load the image pixels into new pixel layers,
- automatically create new animation clips into which the pixel layers are inserted,
- insert a symbol of this clip into the current timeline if only one image was selected.
Supported File Formats#
ToonSquid supports images with the following formats to be imported into your projects.
- PNG
- JPEG
- TIFF
- BMP
- HEIF
- GIF
- WEBP
- SVG
- PSD
Image Sequence Import#
To import a sequence of images directly into multiple drawings of a new animation layer, you can
- Tap the
+button in the timeline.
- Select
Image Sequence. - Choose the images that should be imported in the file dialog.
All selected images will be imported in alphanumeric order of their filenames into pixel layers in consecutive drawings. Each drawing is set to last one frame and the images are scaled to fit into the current project's resolution.
No search results