Layers
Onion Skinning
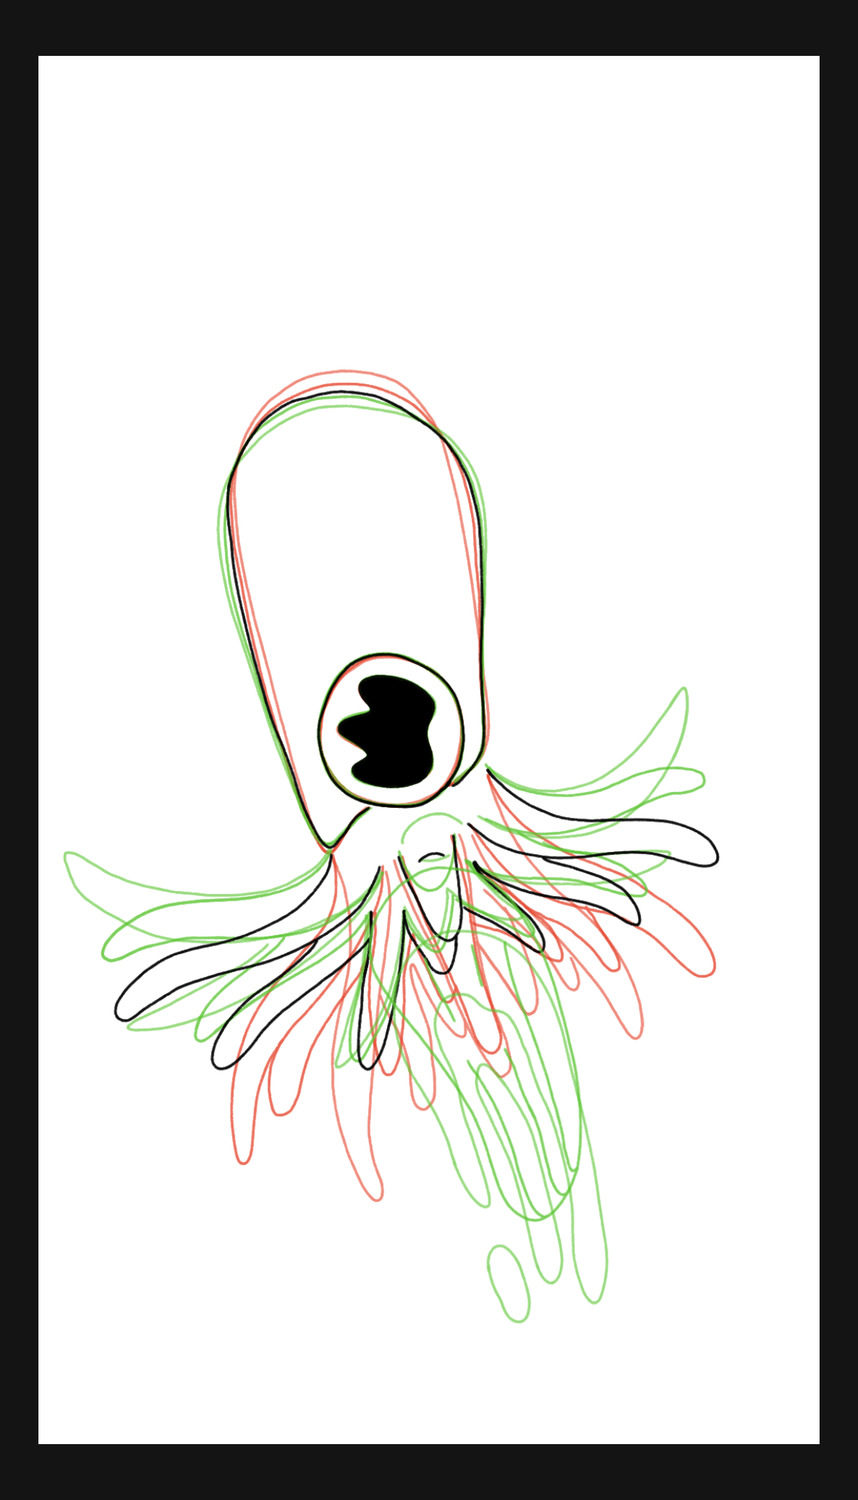
Use the onion skinning feature to see the drawings or frames before and after the current frame. This helps with drawing in-betweens in a traditional animation workflow.
Enabling Onion Skinning#
Tap the onion skin button in the timeline to enable or disable onion skinning in the editor.
Settings#
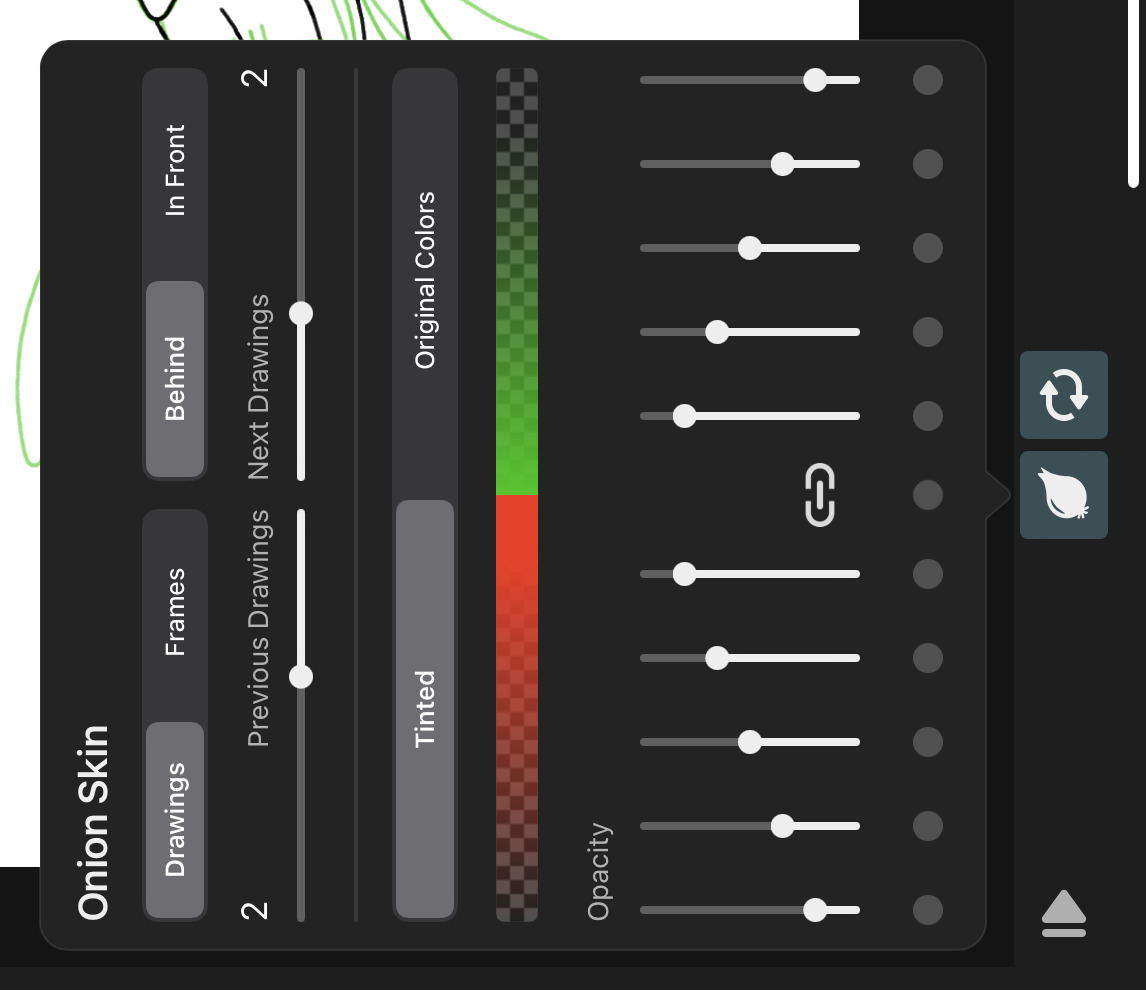
Hold down the onion skin button to see more configuration options.
Mode#
Whether the onion skins should show neighboring drawings or neighboring frames.
Drawings#
In this mode, the onion skin numbers refer to how many drawings before and after the current drawing should be shown as onion skins. Only the first frame of each onion-skinned drawing is shown.
This mode is most useful for traditional frame-by-frame animation where the contents of each drawing don't change over the course of the drawing.
Frames#
In this mode, the onion skin numbers refer to how many frames before and after the current frame should be shown as onion skins. This way you can see multiple frames within the same drawing.
You probably want to choose this mode if you are animating the contents of your drawings using keyframes.
Order#
Controls the order of onion skins and the current drawing.
Behind#
Onion skin frames appear behind the current drawing. This is the default.
In Front#
Onion skin frames appear in front of the current drawing.
Previous Drawings / Next Drawings#
You can configure how many of the drawings or frames before and after the current drawing you would like to see when onion skinning is enabled.
Loop#
Wraps the onion skins around past the first and last drawing in the layer.
When working on a cycle / looping animation, this lets you see the first drawings of your cycle when you are working on the last drawings and vice versa, without having to manually copy and paste any drawings.
Tint Mode#
Controls how the onion skin drawings should be colored.
Tinted#
The colors of the onion skin drawings are replaced with a configurable tint color and a lowered opacity.
Original Colors#
The onion skins show the original colors of the drawings and only their opacity is reduced.
Colors#
You can customize the tint color for the previous and next drawings. Make sure that the tint mode of the onion skins is set to Tinted.
Opacity#
By default, the opacity of the previous and next onion skin drawings decreases the further their distance is from the current drawing. You can use the opacity sliders in order to adjust the individual opacity of each onion skin frame.
Linked Opacity#

Initially, the opacity sliders are linked together for easier adjustment. You can unlink them with this button if you want to change only one slider value at a time.
Layer Settings#
By default, onion skins are only shown for the drawings of the selected animation layer, but you can also manually enable it on individual animation layers if you want to see onion skins on multiple layers at once.
Either use the layer actions or the inspector to enable onion-skins on a particular layer.
Such layers will show an onion skin icon next to the layer name to indicate that they always render onion skins (if onion skins are enabled in the editor).
Out-of-Pegs#
The "Out-of-Pegs" feature lets you temporarily shift the position of surrounding onion skin frames to simplify the creation of inbetween drawings. Overlapping neighboring drawings can help to keep proportions consistent especially when the animation contains non-trivial movement.
This feature is sometimes also known as "Shift-and-Trace".
This is purely a visual aid as part of the onion skinning feature and does not affect the actual position of the drawings in the timeline or in the export.
Let's look at an example:
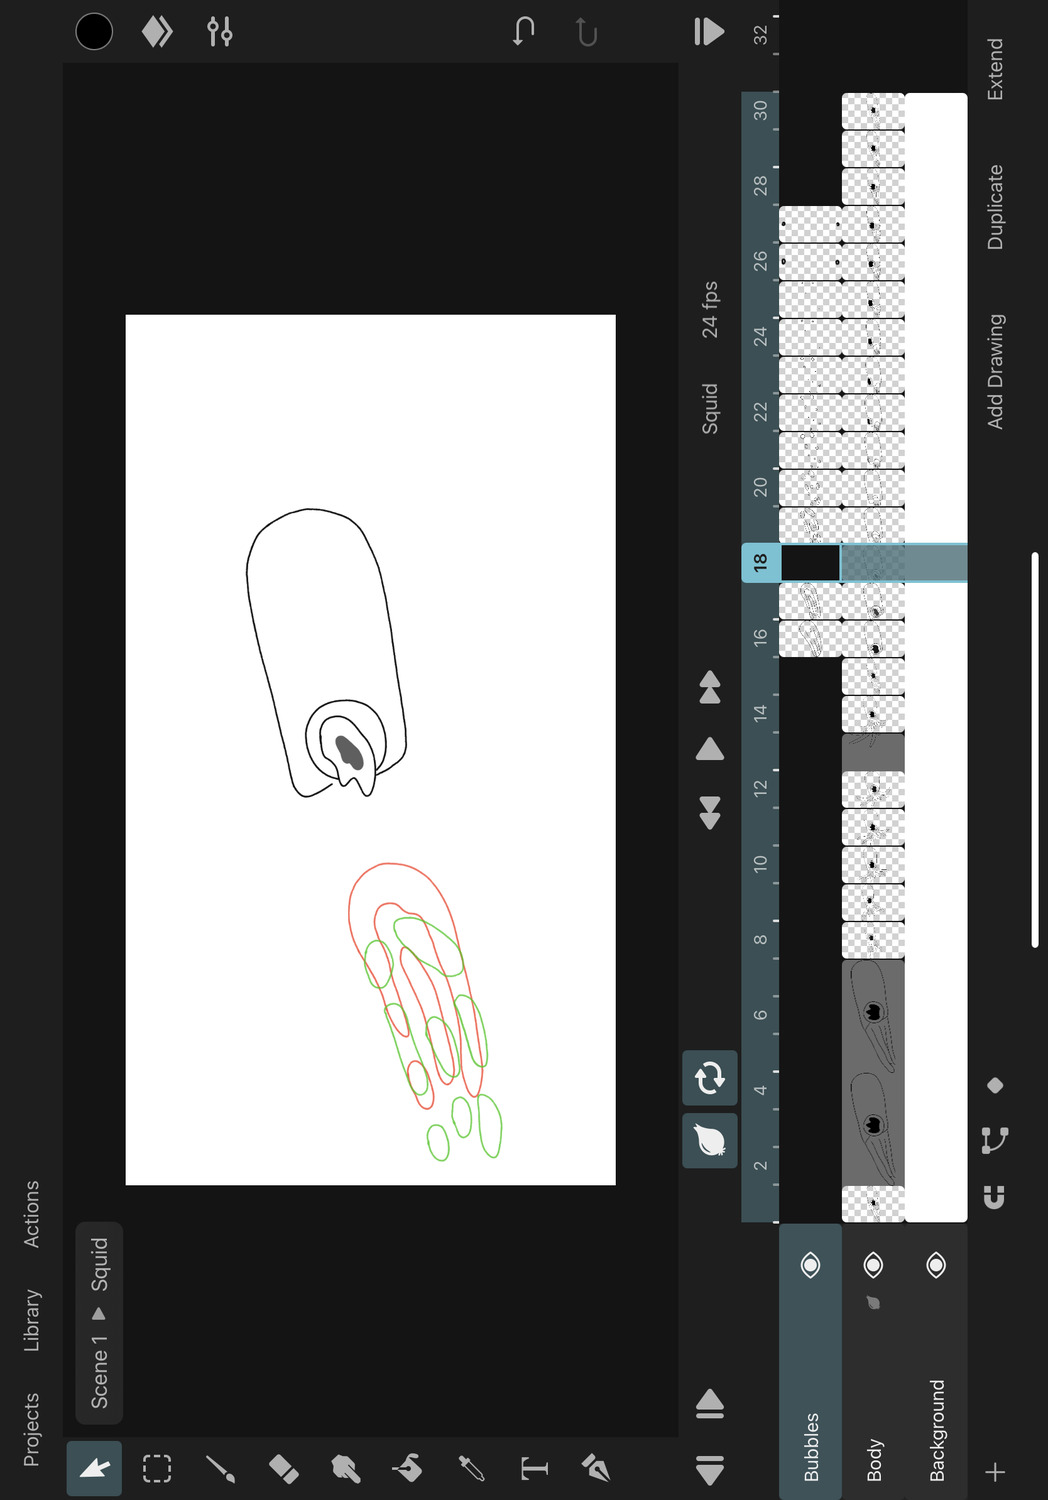
In the animation of the squid in the demo project, the bubbles need to dissipate while simultaneously moving away from the squid. We can use the "Out-of-Pegs" feature to help us add the missing inbetween drawing.
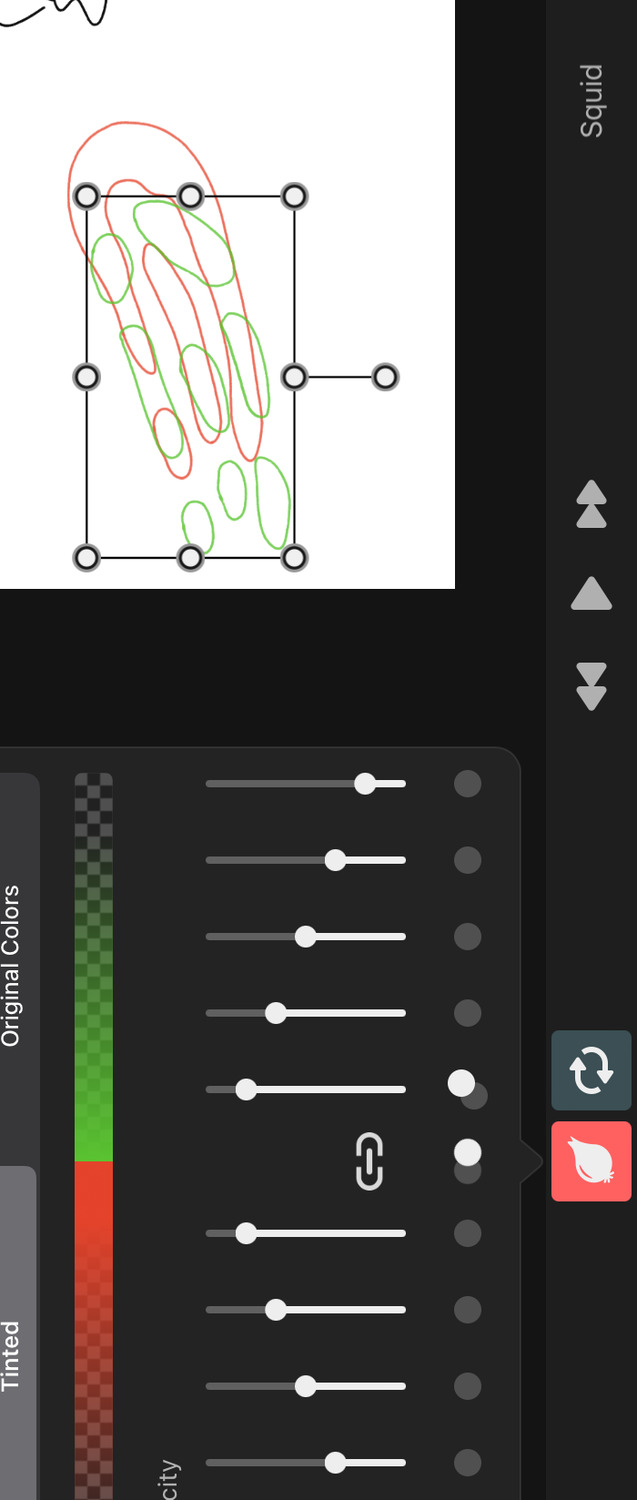
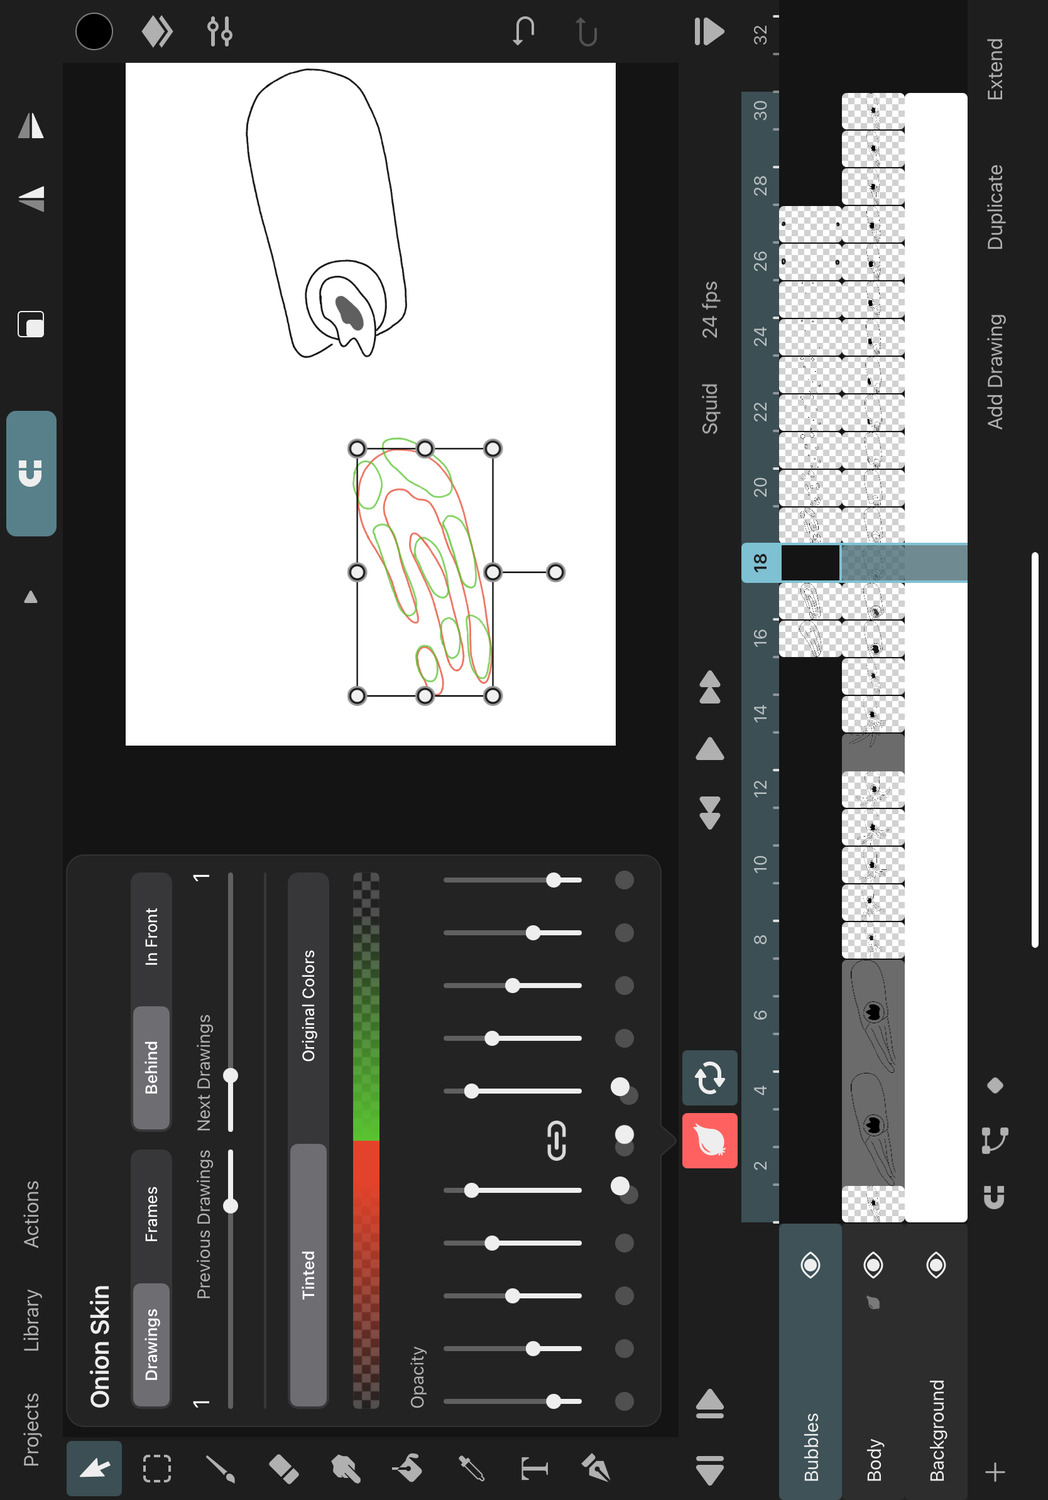
When you open the onion skin options, you will see a row of dots below the opacity sliders. Each of these buttons can be used to enable or disable the out-of-pegs feature for a particular onion skin drawing. The button in the middle is used to disable and enable all current out-of-pegs offsets at once.

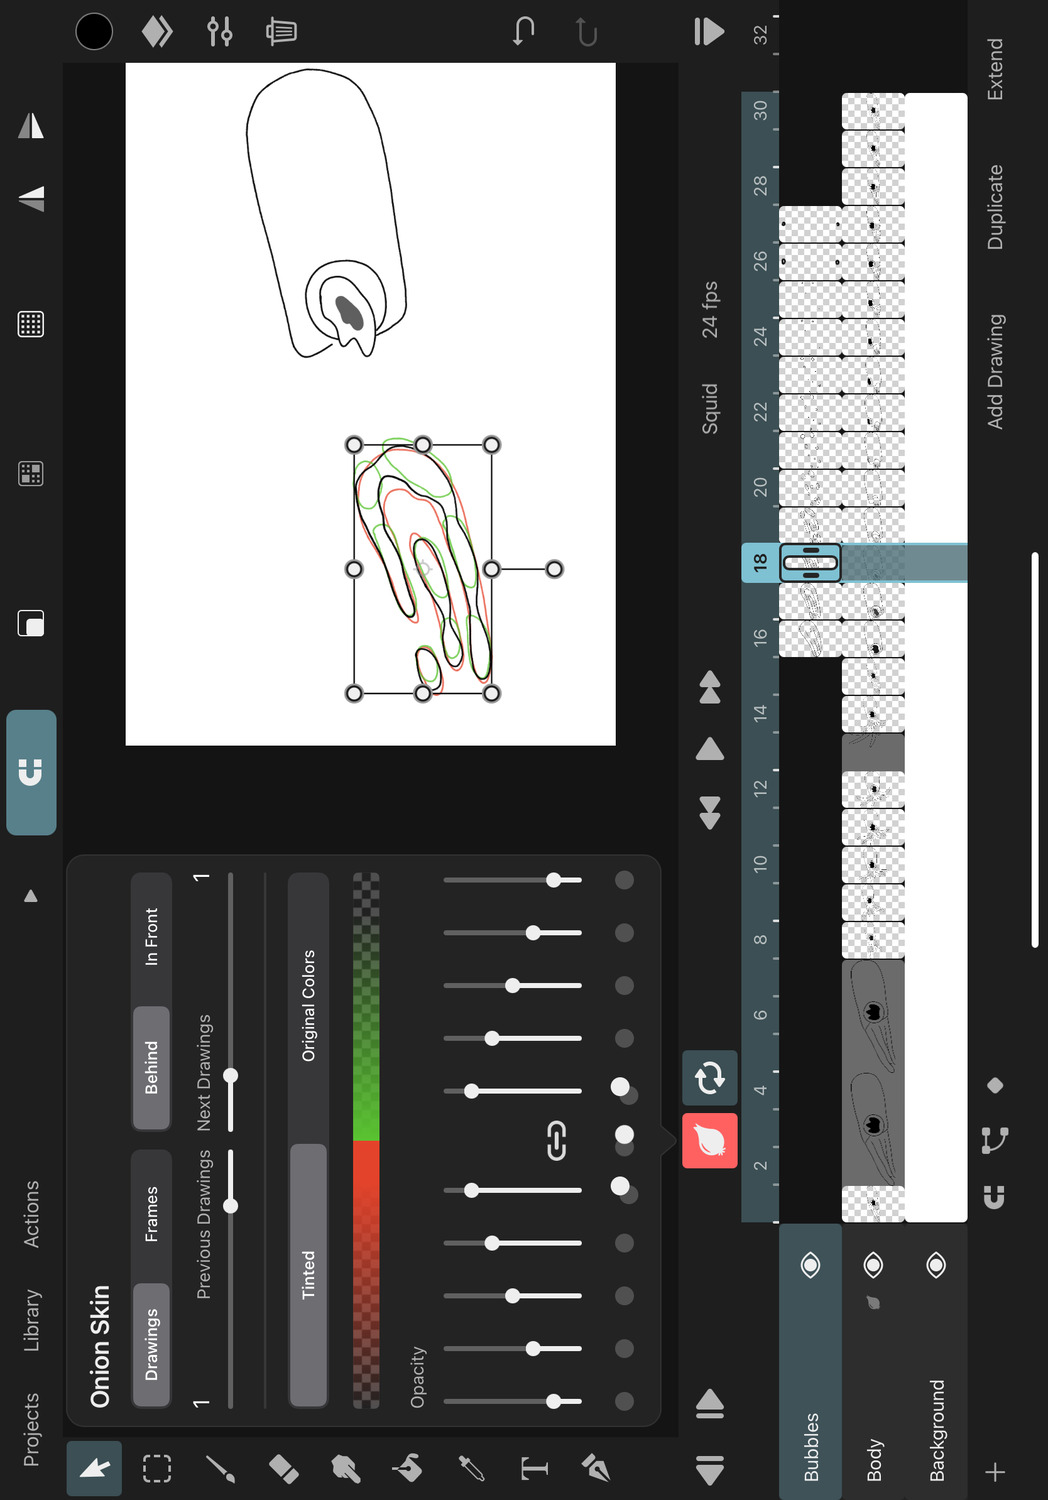
We want to move the previous and next onion skin drawings of the bubble layer into the middle where we are going to add the new inbetween. To do this, we tap the out-of-pegs button under the first opacity slider on the right. This brings up the transform handles on the canvas which we can use to move that onion skin.
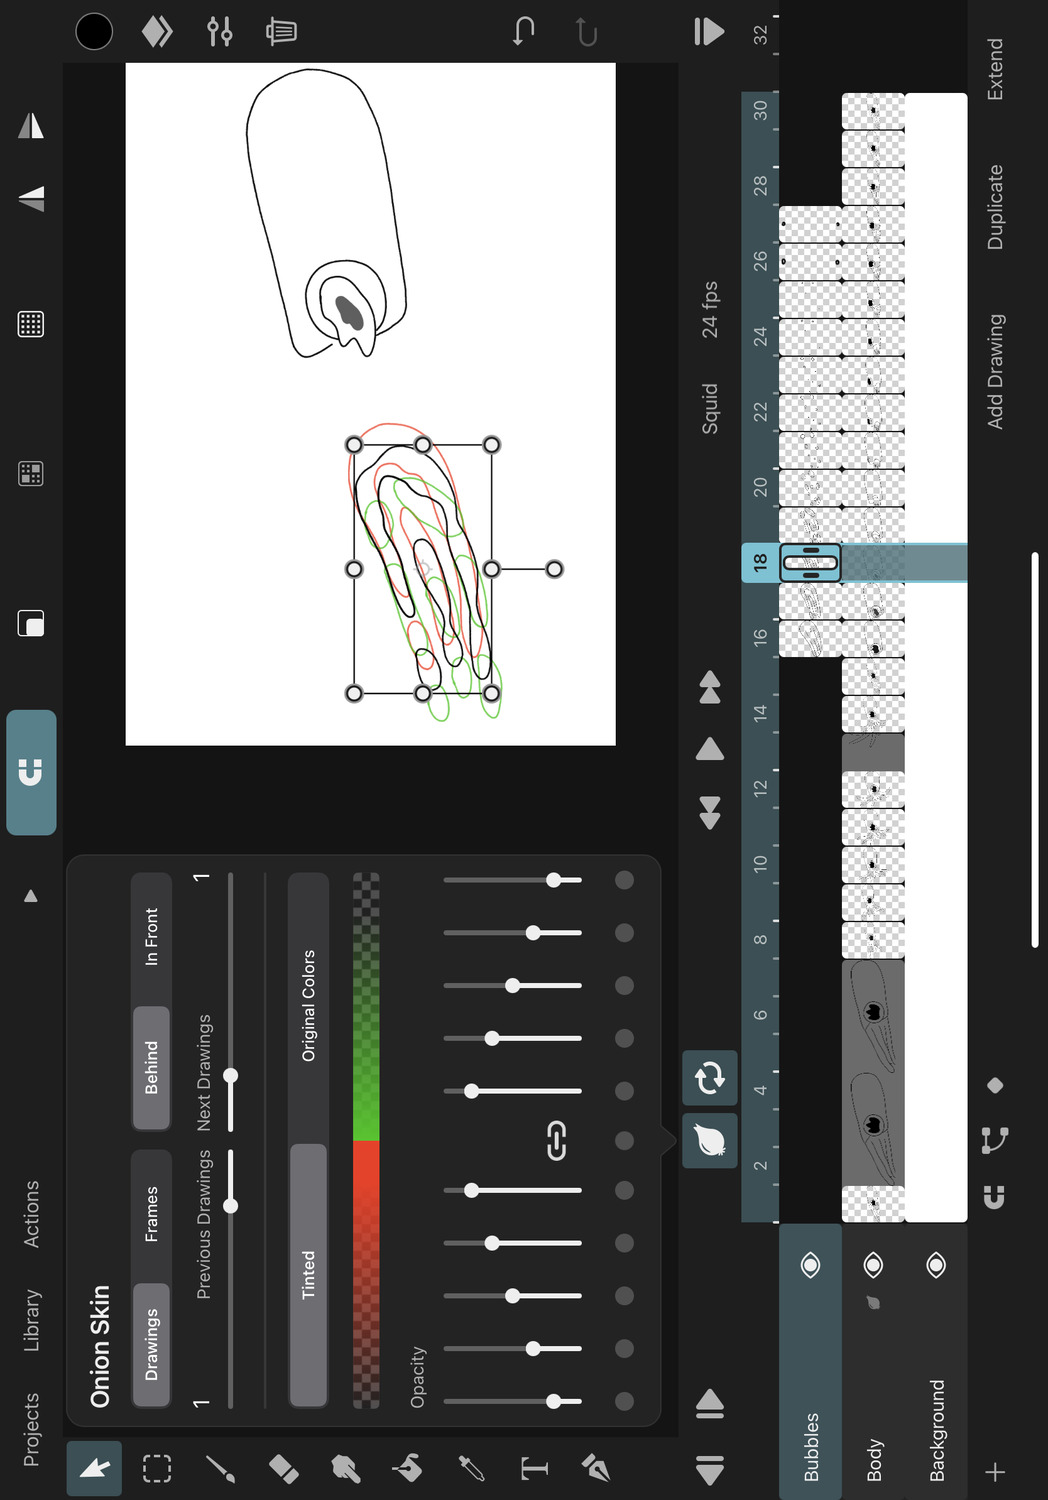
We can repeat the same process with the onion skin before the current drawing and move it to overlap the other onion skin.
Tip#
Notice that the onion skin button in the timeline turns red when the "Out-of-Pegs" feature is active. This is a visual reminder that you might not be looking at the true position of all drawings through the onion skins.
Now we can draw the inbetween drawing in the middle. The onion skins will help us to keep the proportions of the bubble consistent with the previous and next drawings.
Resetting Out-of-Pegs#
If you want to reset the out-of-pegs transform for one of the onion skins, you can tap the out-of-pegs button which corresponds to that onion skin again.

This will remove the temporary transform edit and show the original position of the onion skinned drawing again.
Tap the out-of-pegs button in the center to instead only temporarily disable all out-of-pegs transforms.

If you tap the center button again, the previous out-of-pegs edits will be restored. However, if you instead tap one of the other out-of-pegs buttons to start editing that onion skin, all the other temporary transforms are automatically reset.
This makes it convenient to quickly move to a different frame where you want to work on an inbetween using out-of-pegs edits without having to manually reset the previous out-of-pegs edits first.
No search results