Interface
Library
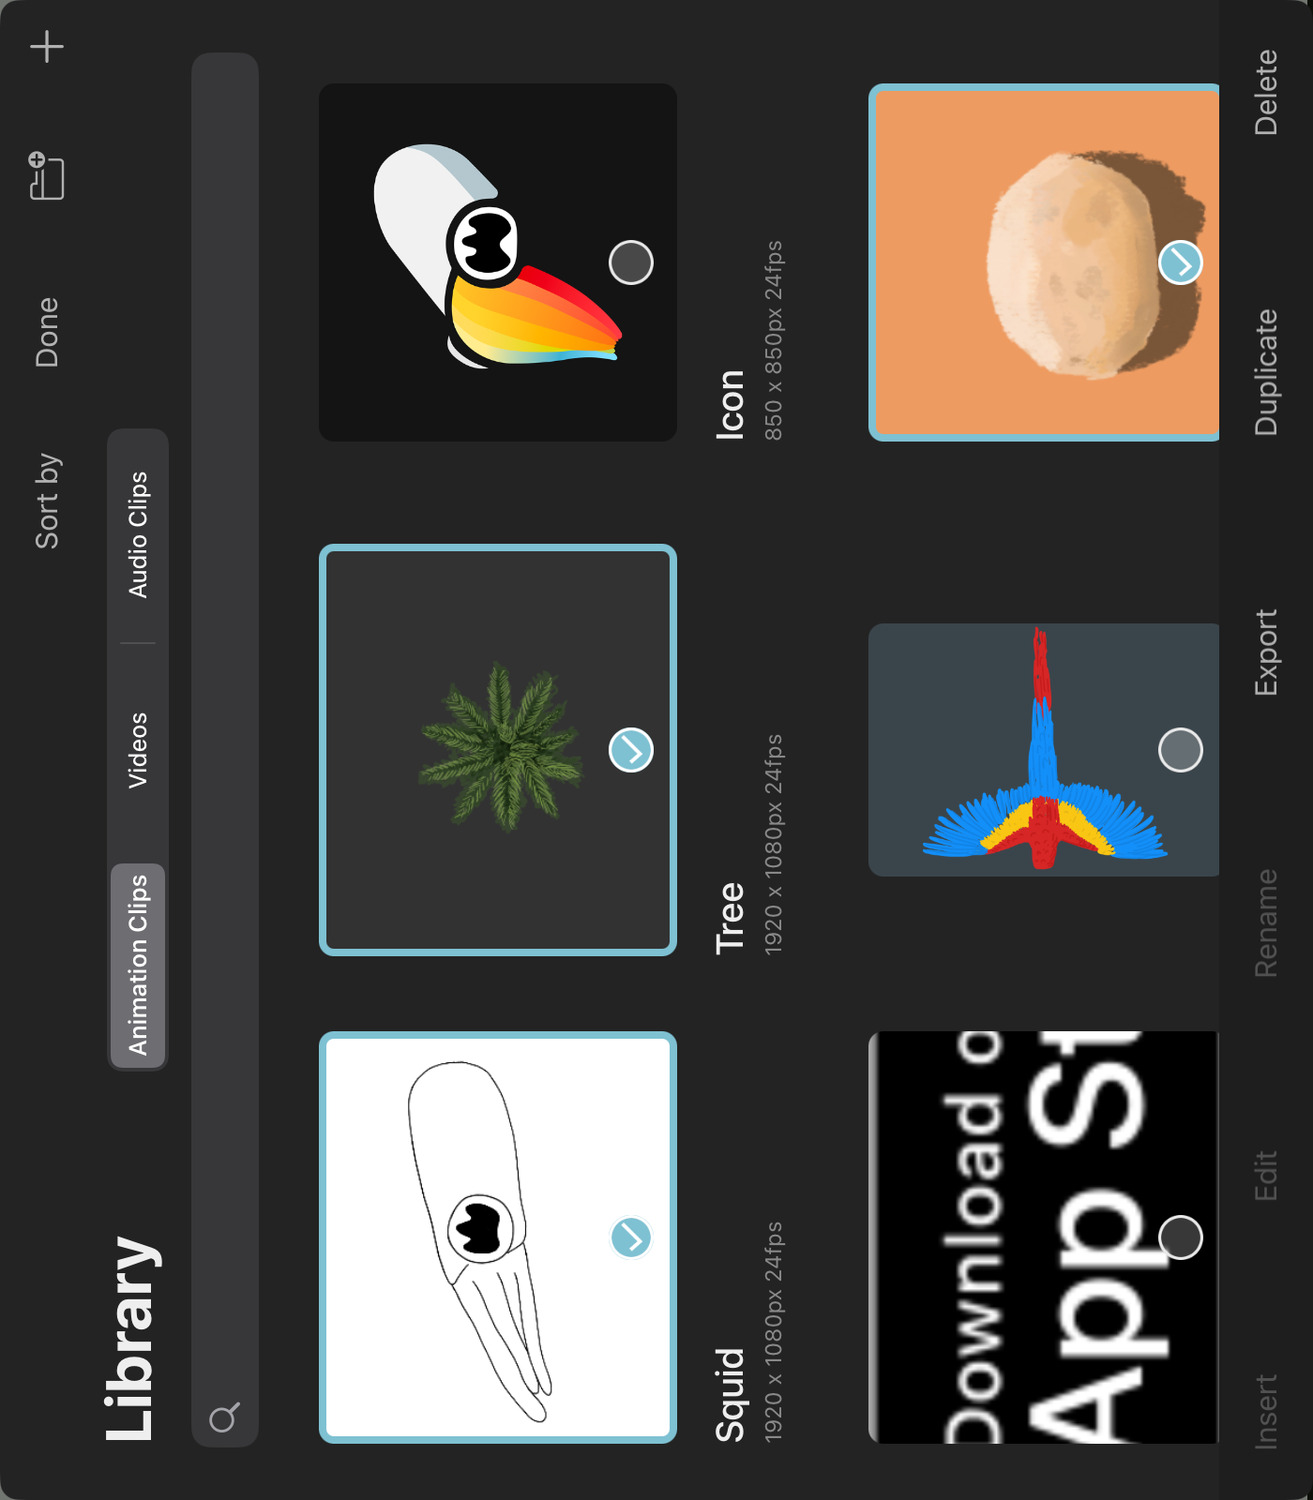
The library interface is used in multiple places across ToonSquid. You'll use it to organize projects, assets such as animation clips, audio and video clips and brush textures.

The different occurrences of the library behave very similarly with the exception that not all buttons are available everywhere.
This interface shows the items within a library with their name, commonly a thumbnail and some additional information, such as the resolution and frame rate of a project.
Tabs#
If the library contains different types of content such as animation, video and audio clips, you can select which type should be visible with the tabs at the top.
Add Content#
Tap the + button in the top right corner to add more content to the library. Other pages cover the process of creating new animation clips, creating new projects and importing video clips and audio clips in detail.
Tip#
You can also drag and drop files with supported file types from other apps to import them into ToonSquid.
Folders#

Tap the button with the folder icon to add a new folder to the library. Alternatively, drag and drop an item onto another item in the library to combine them into a new folder.
You can use folders to organize your projects and assets. Note that the folders that you add to the asset library of a project exist in all tabs of the library.
Tap on a folder to open it and see its contents. Tap the name of the folder in the top left corner to go back to the previous folder.
You can use drag-and-drop to move items into folders. In order to move an item out of the folder that it's currently in, drag it to the name of the folder in the top left corner and hold it there for a moment. The name will start flickering and the library interface will switch to the parent folder, where you can then drop the item. Similarly, drag and hold an item over a folder to navigate into it.
Search#
Use the search bar above the contents of the library to quickly find the items that you are looking for. This searches the items based on their name.
Use the small cross icon to clear the search and see all items in the library again.
Sort#
Use the Sort by button to change the order of the items in the library. You can sort them by name and by their last modified date. The project library can also be sorted by creation date or by kind, which sorts folders before projects and otherwise alphabetically.
Rename#
Tap the name of an item in the library to start editing it. When you are done, dismiss the keyboard or tap outside the name label.
Select#
You can switch into selection mode by either long-pressing on an item or by using the Select button.
Use the Done button (which replaces the Select button) to exit the selection mode once you are done.

In the selection mode, you can tap individual items to add or remove them from the selection.
A toolbar at the bottom of the library shows the available options for the current selection of items. Some options are only available if exactly one item is selected.
Insert#
Inserts the selected animation clip, video clip or audio clip into the current animation timeline.
This is the default behavior of tapping an item in the asset library outside of the selection mode.
Edit#
Opens the selected project or animation clip to be edited in the editor.
Rename#
Prompts the item to be renamed.
Export#
If the selected item is a project, the project is exported and a screen is opened for you to choose a location to save it.
If the selected item is an animation clip, the export interface is opened to export the selected clip.
When you have one or more assets selected, open the export interface and choose the project export option, the exported project will only contain your selected assets.
Duplicate#
Duplicates the item in the library.
Delete#
Deletes the item from the library.
Deleting assets (animation clips, videos, audio clips) from the asset library is undoable. However, deleting projects is not undoable, so consider creating a backup of your projects before you delete them.
No search results