Effects
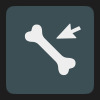
Bones
The bones effect allows you to create a skeleton rig for a layer or a group of layers. This is a powerful tool for character animation, as it makes it possible to animate the layers by moving the bones of the rig.
Bone Binding#
The connection between bones and the layers they control is called binding. If you add a bones effect to a layer, all bones in the effect are automatically bound to the layer. If the layer is a group, all layers in the group are bound to the bones.
With path layers and vector layers, the bones bind to the individual path control points. This allows you to animate the shape of the path by moving the bones. Path layers and vector layers retain their vector qualities when animated with bones.
If a bound layer has a mesh effect or a warp effect, then the bones bind to the control points of the mesh or warp effect. That effect then controls the deformation of the layer instead of the bones directly.
Pixel layers that are bound to bones are automatically warped as if they had a warp effect attached to them. For more control over how exactly the pixel layer should be deformed, use a mesh effect.
The closer a bound layer or control point is to the bone that it is bound to, the more it is affected by movements of the bone.
When bones are bound to any other layer that has transform properties (e.g. symbol layers or text layers), the bones will control the position, rotation and scale of the entire layer. If you want such layers to be deformed by bones, add a mesh effect to them.
Bind Pose#
When working with bones, there are two different states that the editor can be in, which allows you to edit the skeleton in two distinct ways:
- Editing the bind pose of the skeleton.
- Animating the skeleton using keyframes.
The bind pose defines the position, rotation and size of the bones with which they should bind to the individual layers. This configuration is how the bones effect later knows how to move the bound layers when you animate the bones.
Therefore, creating the bind pose is the first step when creating a bone rig. For example, if you have already drawn a character that you want to animate with bones, you would create the bind pose by placing and aligning the bones to the character's body parts.
In order to see and edit the bind pose, disable effects in the editor using the FX button. All bone edits you make when effects are disabled are applied to the bind pose of your rig.
On the other hand, when effects are enabled, edits that you make to the bones will insert keyframes and animate the bones. Note that keyframe insertion for bones when effects are enabled happens regardless of whether the keyframing mode in the timeline is active or not.
To sum up:
- FX disabled -> edit the bind pose
- FX enabled -> animate the bones
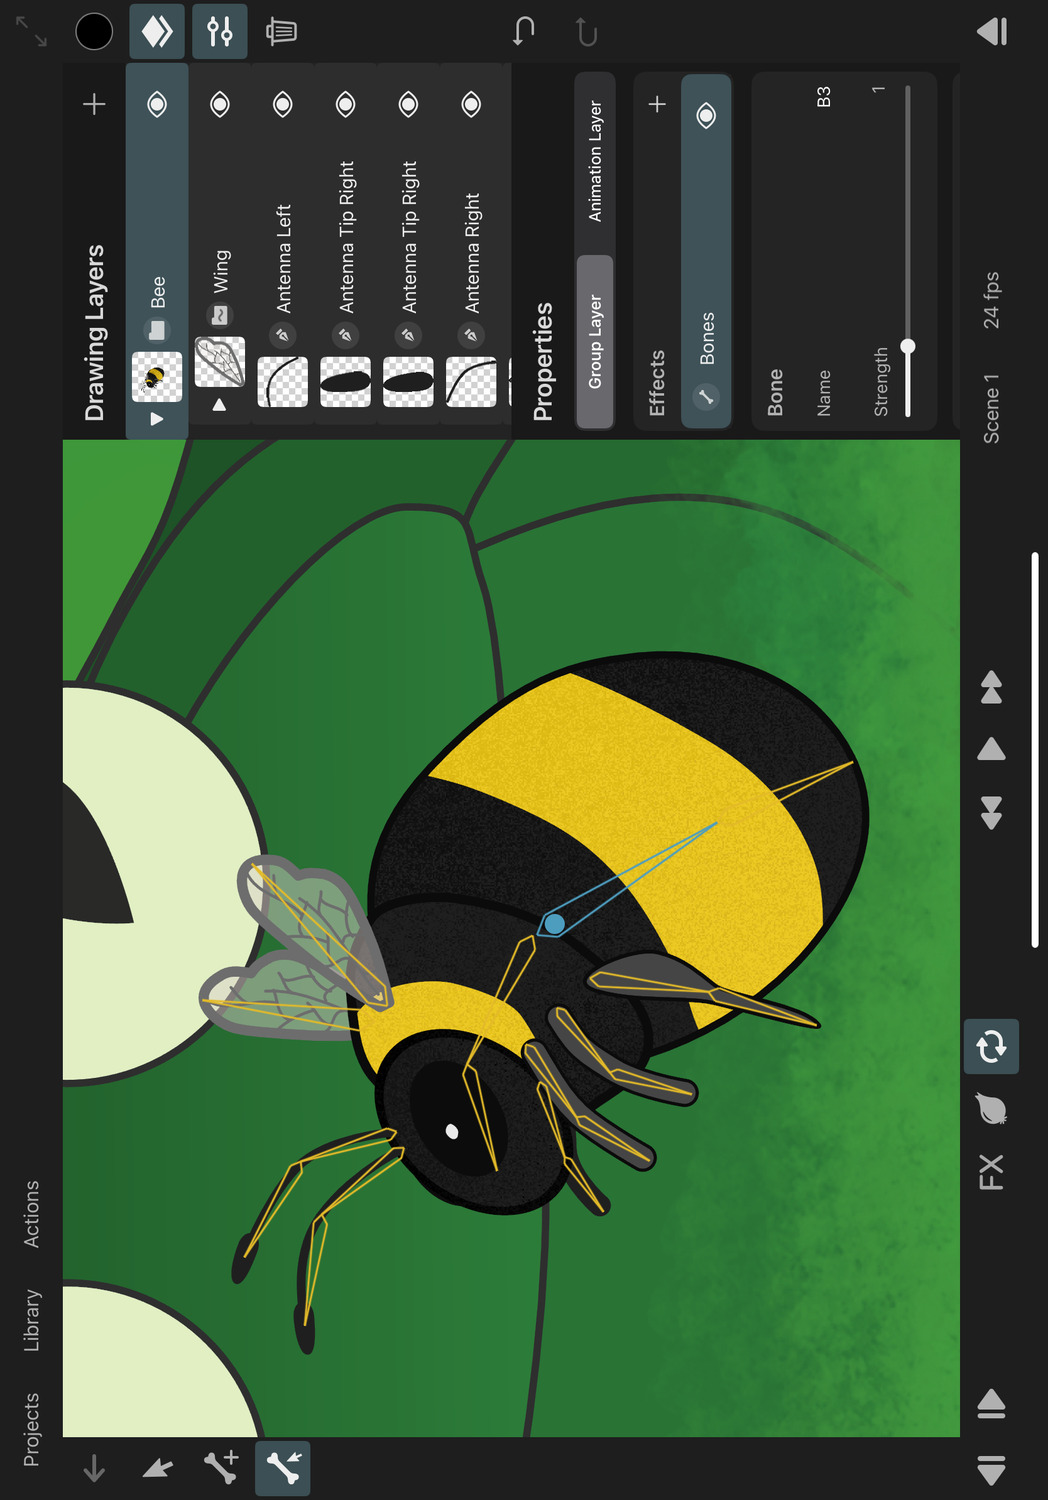
Adding Bones#
In order to add bones to a layer, you need to first add a bones effect to the layer. You can only have one bones effect per layer.
With the bones effect selected:
- Select the
Add Bones Toolin the sidebar. Its icon shows a bone with a plus sign. - Touch and drag on the canvas where you want your bone to appear. This creates a new bone.
The point where you first touch the canvas becomes the base of the new bone. The bone is then drawn from that point to the tip of your finger. Bones always rotate around their base point.
It is important to note that the currently selected bone automatically becomes the parent of any new bone that you add. This way you can create the bone hierarchy immediately while creating the skeleton. If you don't want the new bone to be a child of any other bone, first deselect the currently selected bone.
Selecting and Deselecting Bones#
Tap a bone on the canvas in order to select it. Tap anywhere else on the canvas to deselect the selected bone.
When a bone is selected, its properties are shown in the inspector.
The selected bone is highlighted in a different color than other bones. You can customize both the default bone color and the selected bone color in the settings.
Keyframes#
When a bone is selected, only the keyframeable properties of this selected bone are shown in the timeline. Edits to each bone automatically insert keyframes for only that single bone and not for all bones.

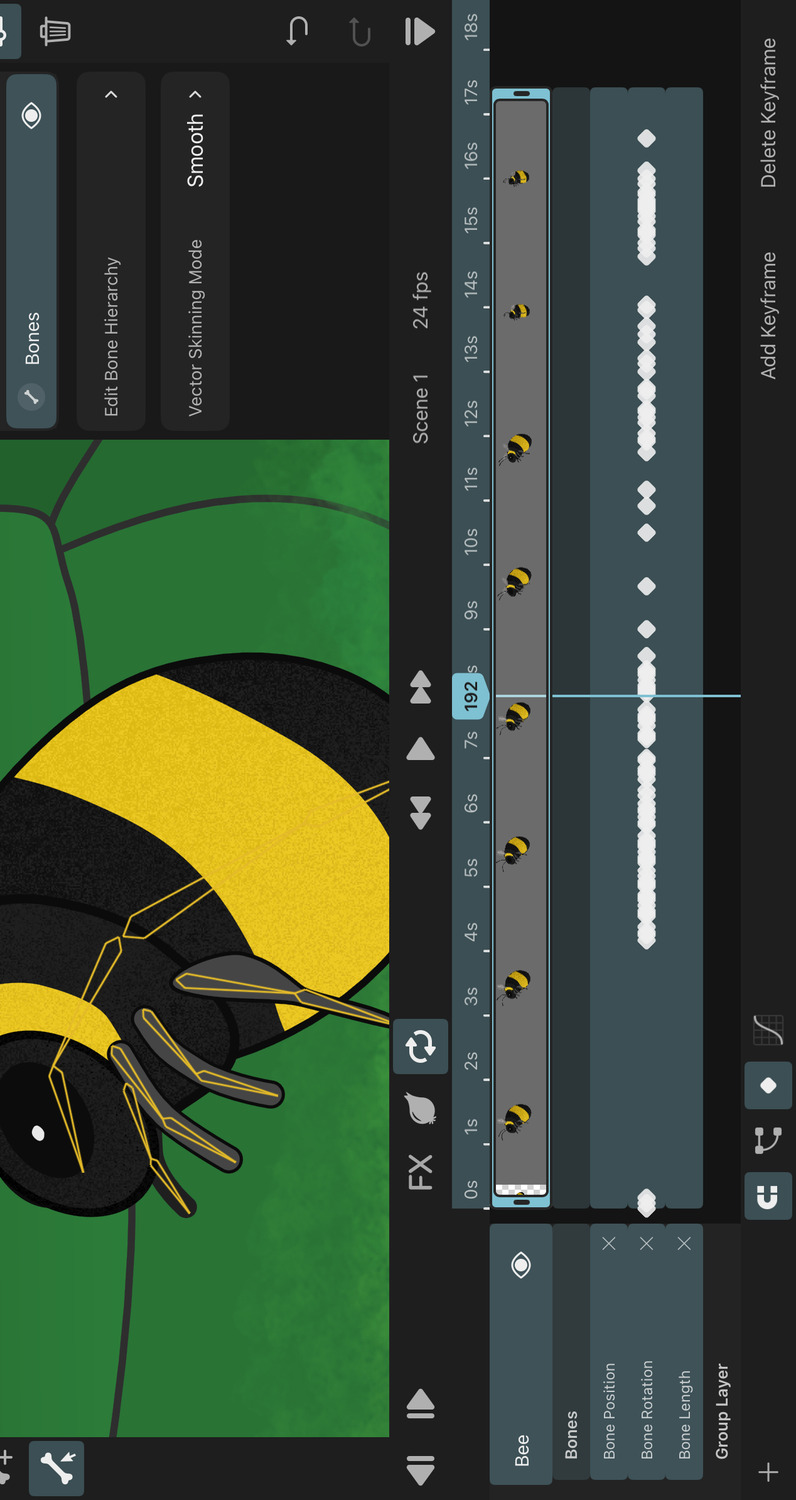
To add or delete keyframes of all bones manually, deselect any potentially selected bone on the canvas and tap the Bones property in the timeline. Then either use the Add Keyframe button in the timeline or tap Bones again and choose Delete Keyframes.
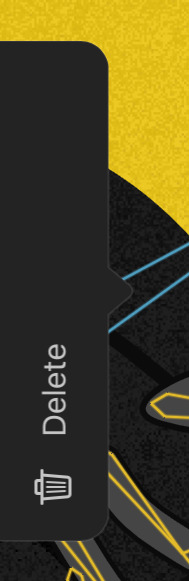
Deleting Bones#
- Select the bone you want to delete.
- Tap the selected bone again and choose
Delete.
Transform Bones Tool#
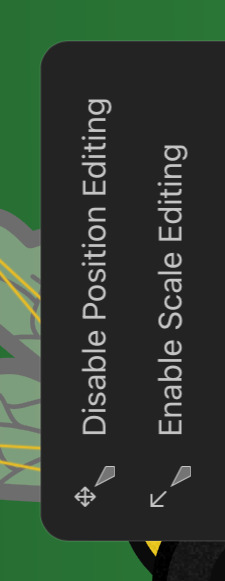
To transform bones, select the Transform Bones Tool in the sidebar. Its icon shows a bone with a pointer. With this tool selected, you can
- drag near the base of a bone to move it
- drag near the tip of a bone to scale it
- drag anywhere else to rotate the bone
By default, scale editing is disabled. You can enable it by tapping on the selected bone and choosing Enable Scale Editing. In the same way, you can disable position editing using the Disable Position Editing option. These settings apply to all bones. Disabling position or scale edits can be useful for avoiding unwanted edits.
Bones get automatically selected when you start dragging them, if they weren't already selected.
As mentioned above, the behavior of the transform bones tool changes depending on whether effects are enabled or not. When effects are disabled, the tool edits the bind pose of the bones. When effects are enabled, the tool animates the rig.
Tip#
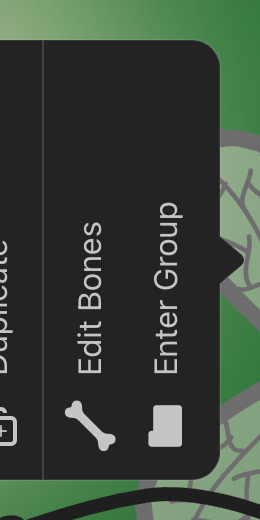
It is possible to switch from normal layer editing to bone editing via the canvas without having to open the inspector just to select the bones effect. If the transform tool is active and the layer with the bones effect is selected, you can tap the layer and select
Edit Bones. This will automatically select the bones effect and switch to the bones tool.
Custom Bone Binding#
By default, when you add a bones effect to a group, all bones of the effect are bound to all layers in the group. However, you can also customize this binding and manually choose which exact layers should be bound to which bones.
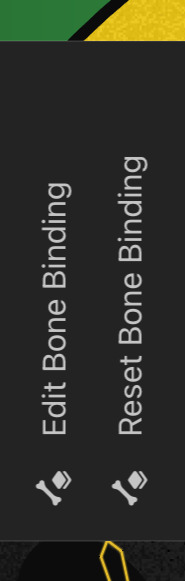
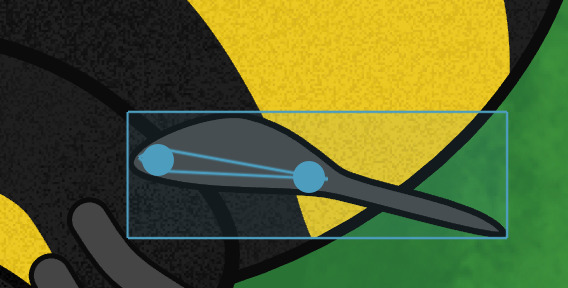
- Tap the selected bone whose binding you want to edit.
- Choose
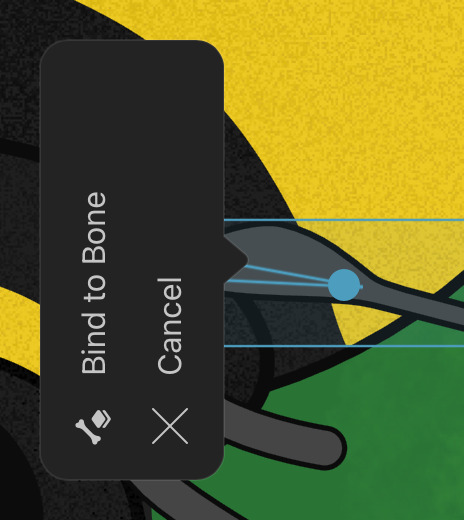
Edit Bone Binding. - Tap the layer that you want to bind to the bone on the canvas. The selected layer gets highlighted.
- If the correct layer is highlighted, tap it again and select
Bind to Bone. The bone is now bound to the layer.
- Repeat these steps if you want to bind more layers to the same bone.
If you want to exit the binding editing mode, tap on the highlighted layer and select Cancel.
In step 4, if the group is a timeline layer, you have the choice of binding the bone to the highlighted drawing layer (Bind Drawing Layer to Bone) or to the entire animation layer (Bind Animation Layer to Bone), which in turn automatically binds the bone to all drawing layers in all drawings of the animation layer.
Alternatively in step 4, select Unbind from Bone to remove the binding of the bone to the layer.
Instead of editing the custom binding of bones and layers on the canvas, you can also do this in the inspector by tapping on Edit Bone Bindings. See Bone Bindings for more information.
Behaviour#
- Any bone can be manually bound to one or more layers.
- Any layer can be manually bound to one or more bones.
- Bones and layers that are part of such a manually defined binding are only bound to the layers / bones that are part of this binding. They are not automatically bound to any other layer / bone any more.
- All other bones and layers that are not part of a manually defined binding are automatically bound to each other.
Reset the Custom Bone Binding#
In order to reset the custom binding of a bone, tap the bone and choose Reset Bone Binding.
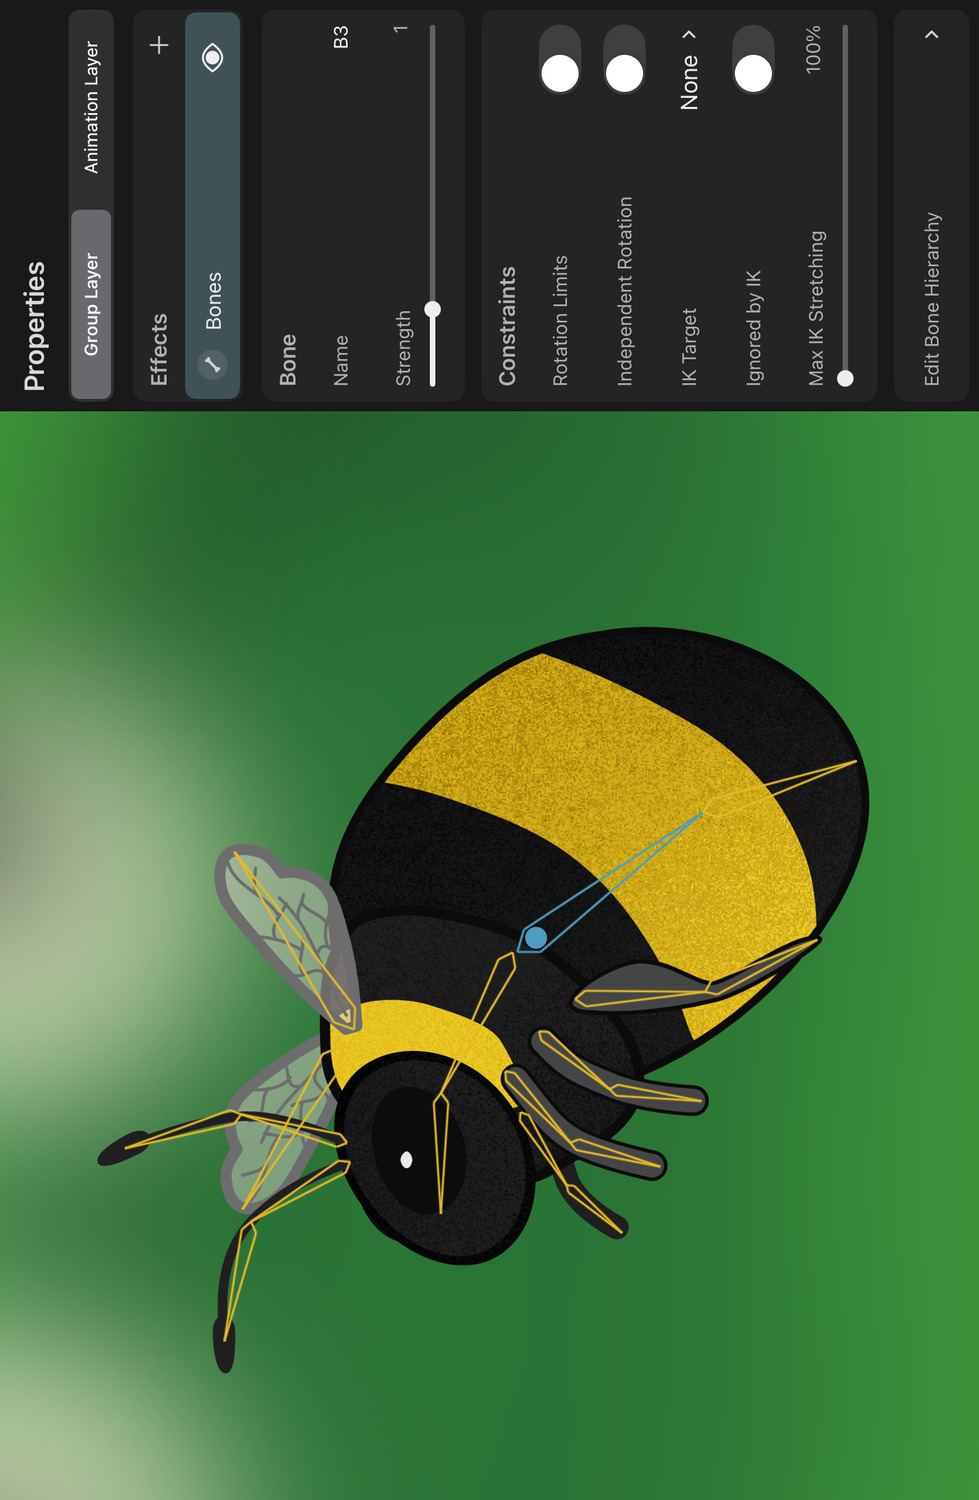
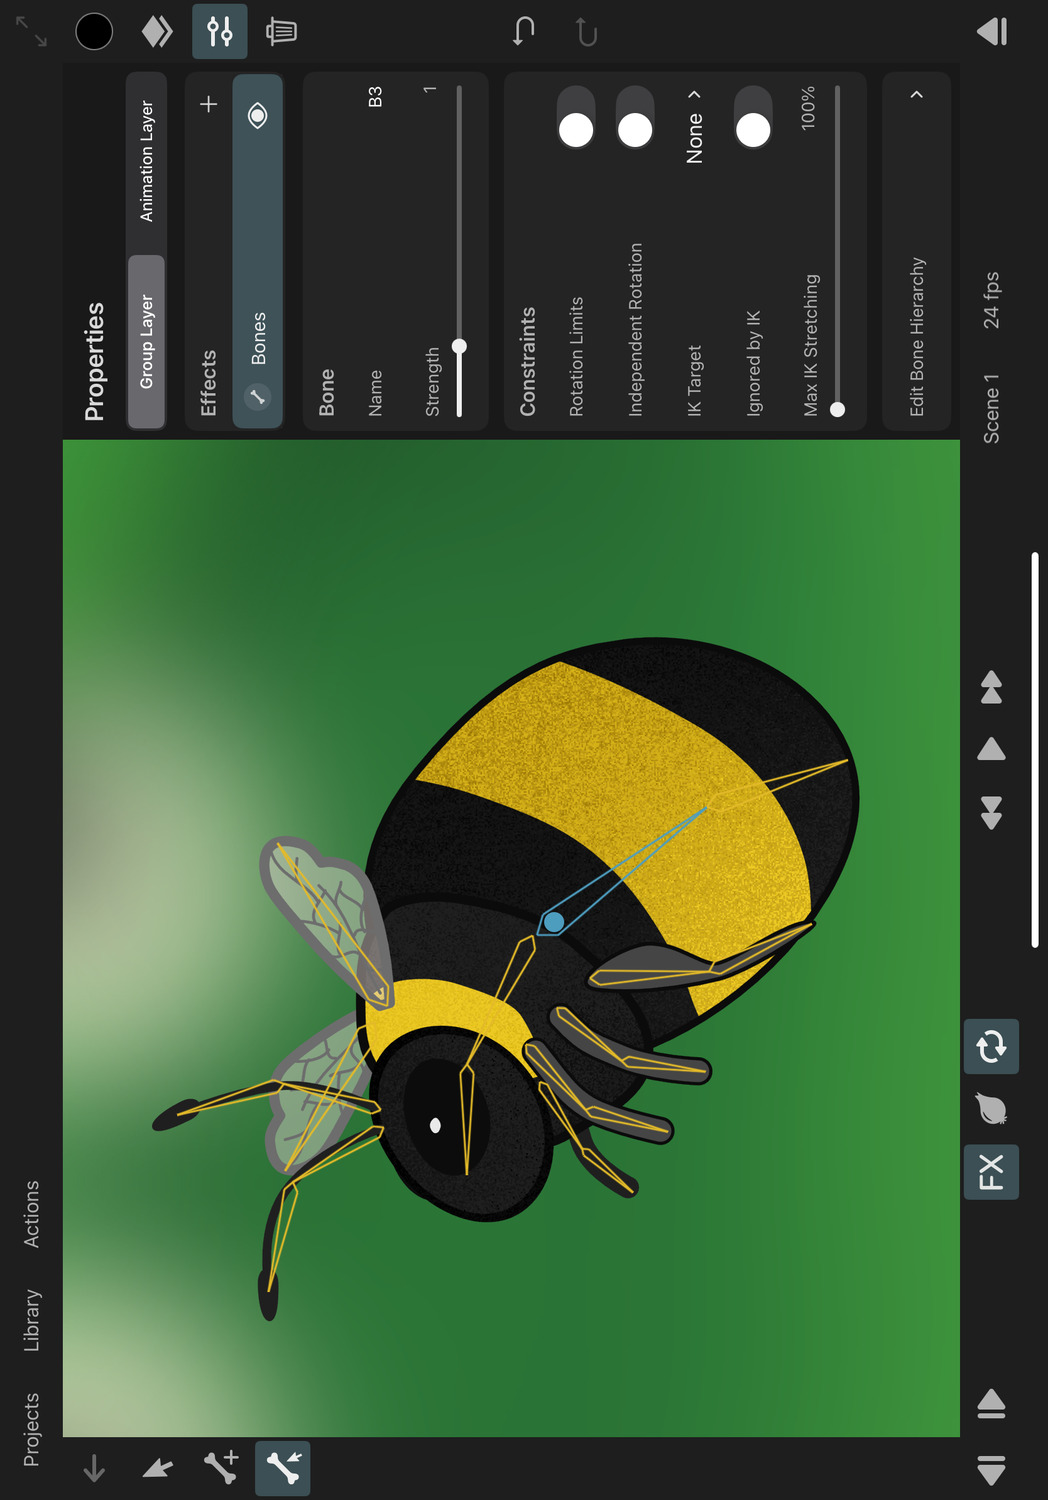
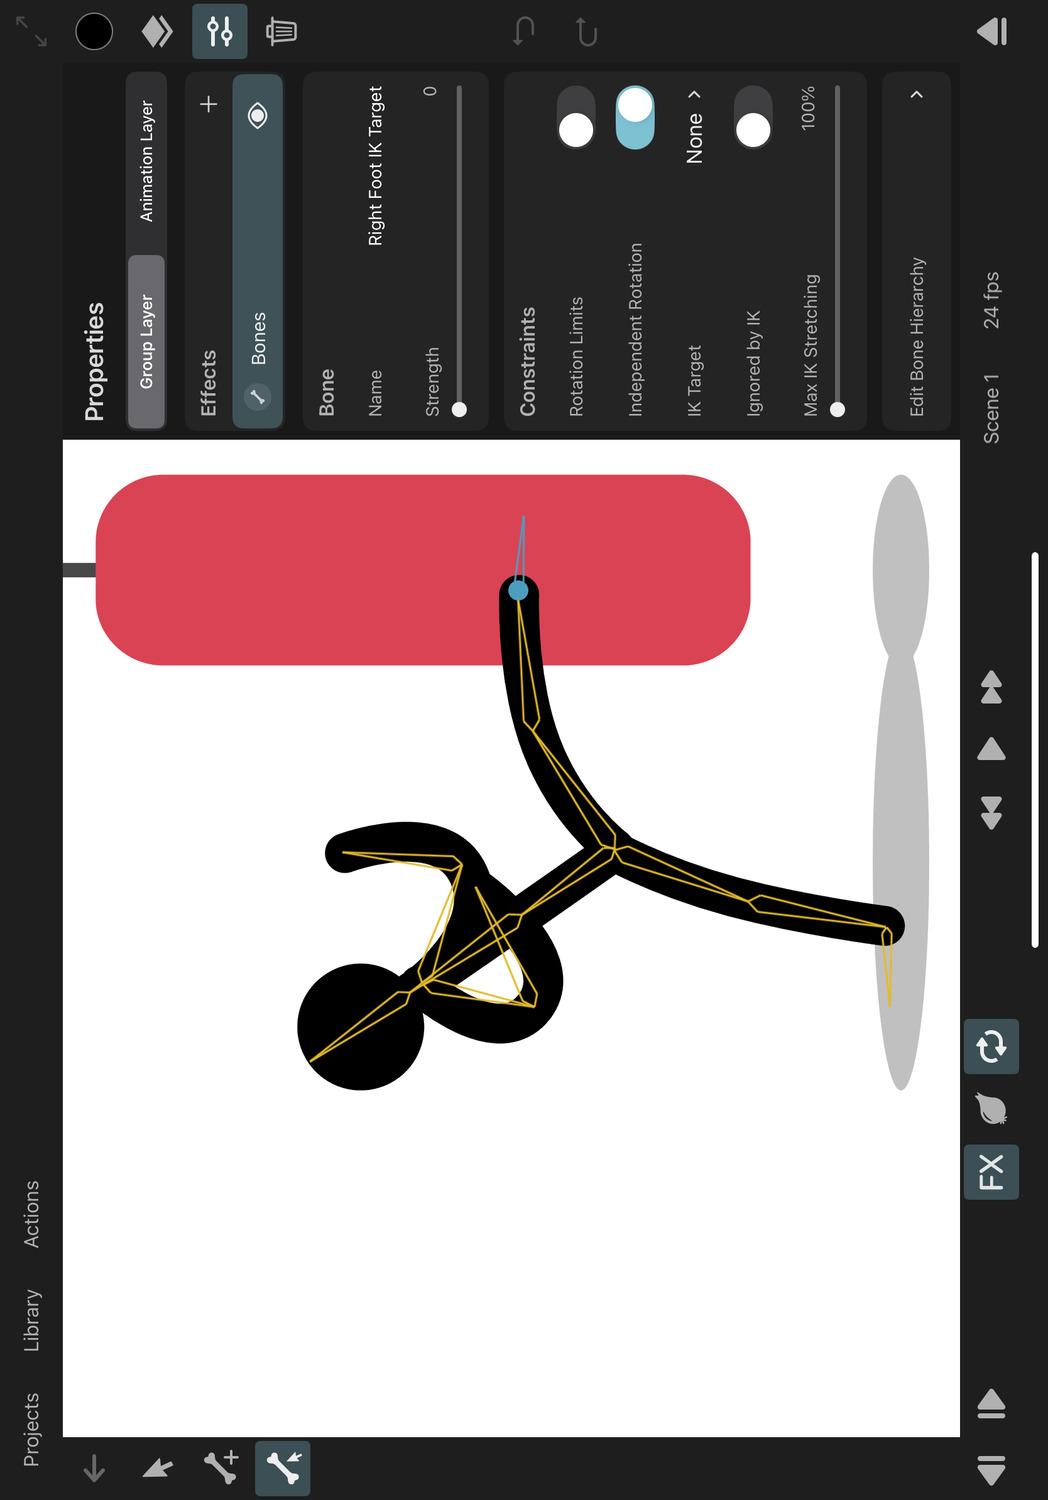
Bone Properties#
The following are the properties of individual bones, which can be edited in the inspector when a bone is selected.
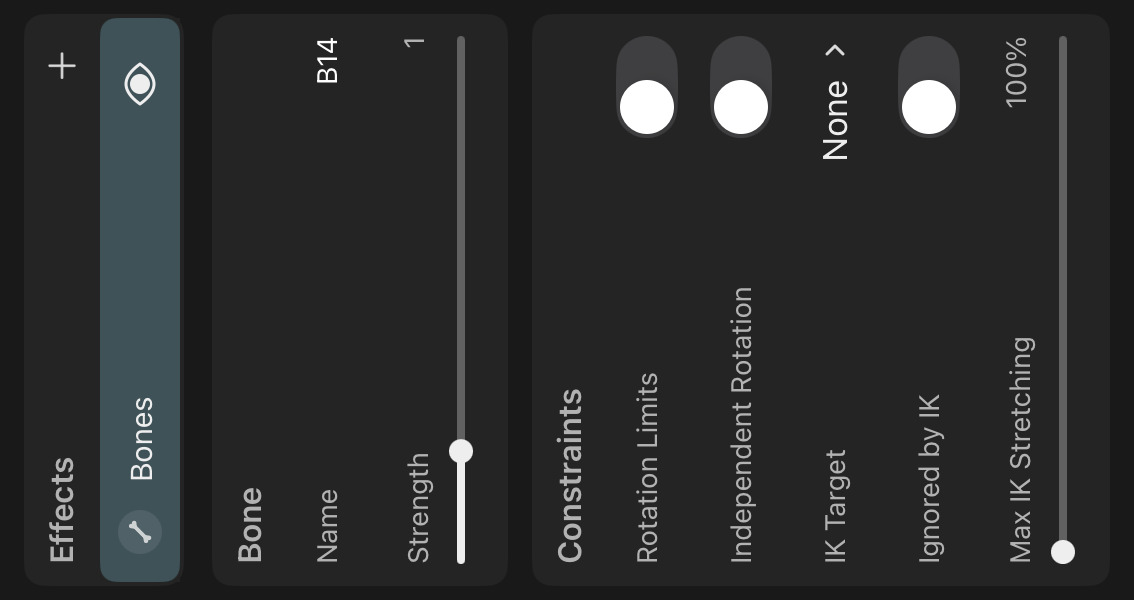
Name#
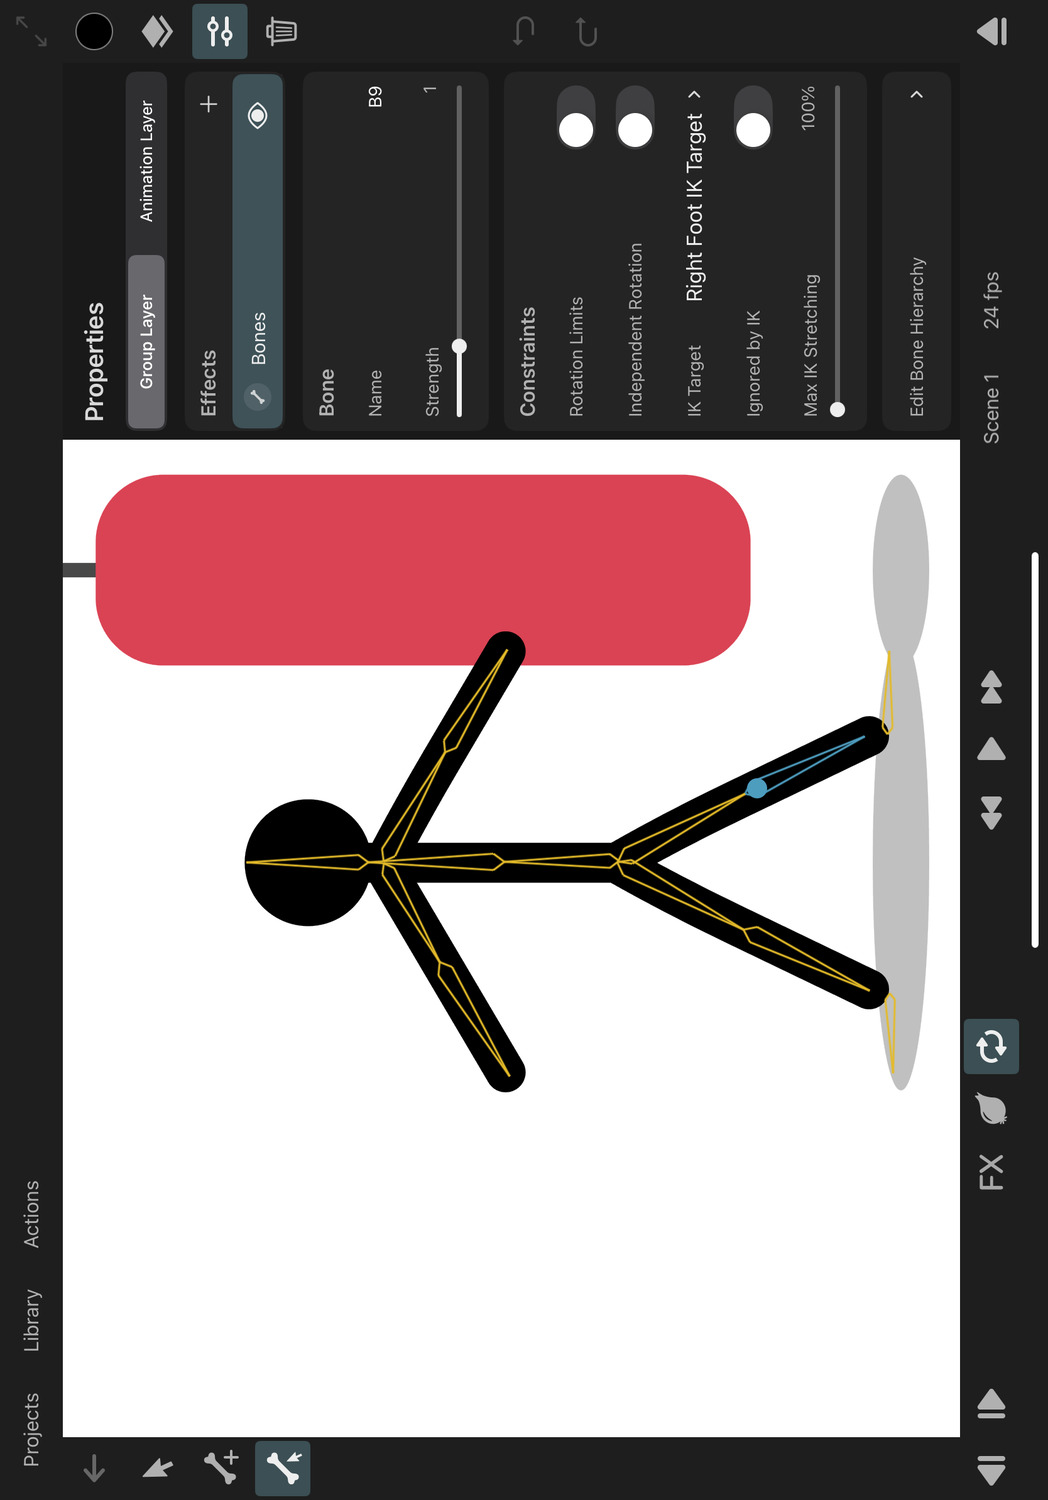
The name of the bone. This is useful for identifying bones in the timeline, the bone hierarchy and when choosing IK targets.
Strength#
Defines how much the bone affects its bound layers. A strength of 0 means that the bone has no effect on any layer.
The movement of each layer or control point that is bound to a bone is determined by the following factors:
- The distance of the control point / layer from the bone
- The length of the bone in the bind pose
- The strength of the bone
Constraints#
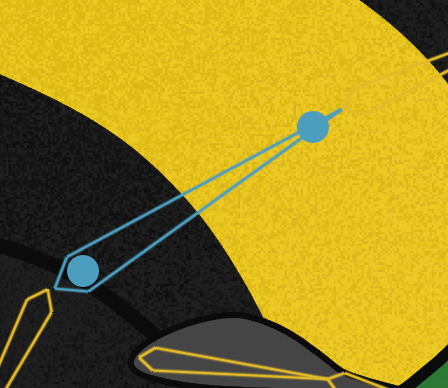
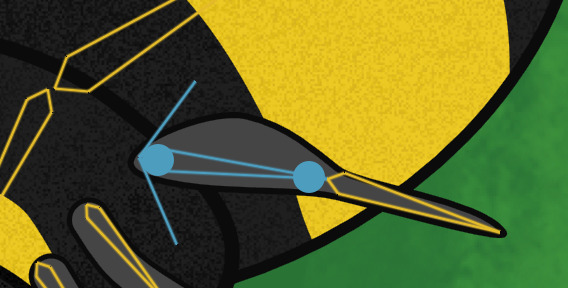
Rotation Limits#
How far the bone is allowed to be rotated relative to is rotation in the bind pose. You can define separate limits for the positive and negative rotation directions. By default, bones have no rotation limits.
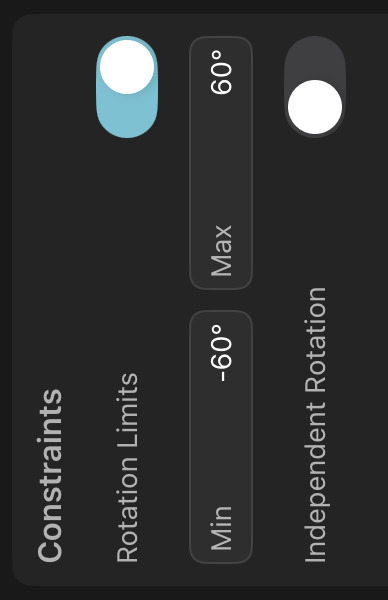
If rotation limits are enabled for a bone, they are visualized as two lines that extend from the base of the bone when the bone is selected.
Independent Rotation#
Whether the rotation of the bone should be independent of the rotation of its parent bones or not.
By default, bones in a hierarchy are positioned and rotated relative to their parent bones, meaning that if you rotate a parent bone, the child bones automatically rotate as well.
IK Target#
Which bone should act as the inverse kinematics target bone of this bone. By default, bones don't have an IK target. You can choose an IK target from the list of all bones in the same bones effect.
Ignored by IK#
Whether the bone should be ignored when determining IK chains. Enabling this can therefore have two effects:
- The bone will not be part of any IK chain.
- Sometimes you might want to add additional child bones for visual purposes to a bone that is part of an IK chain, but without breaking the chain itself, which is what happens by default when a bone has multiple children. In this case, you can enable
Ignored by IKfor these additional bones and they will not count towards the single-child rule.
Max IK Stretching#
How much the length of the bone is allowed to increase if it is part of an IK chain in order for the chain to reach the IK target.
Bone Hierarchy#
Bones in a skeleton rig are commonly arranged in a hierarchy, so that the movement of parent bones automatically affects the movement of their child bones. This is useful for creating complex animations with a minimal amount of keyframes.
For example, if you are rigging an arm, you might have a bone hierarchy consisting of three bones. The upper arm bone at the root, the lower arm as the child of the upper arm and the hand as the child of the lower arm. When you rotate the upper arm, the lower arm and the hand will automatically rotate as well.
When you add a new bone, it automatically becomes a child of the currently selected bone. If you want to later edit the bone hierarchy, open the inspector and tap on Edit Bone Hierarchy. This will show a list of all bones and their hierarchical relationships.
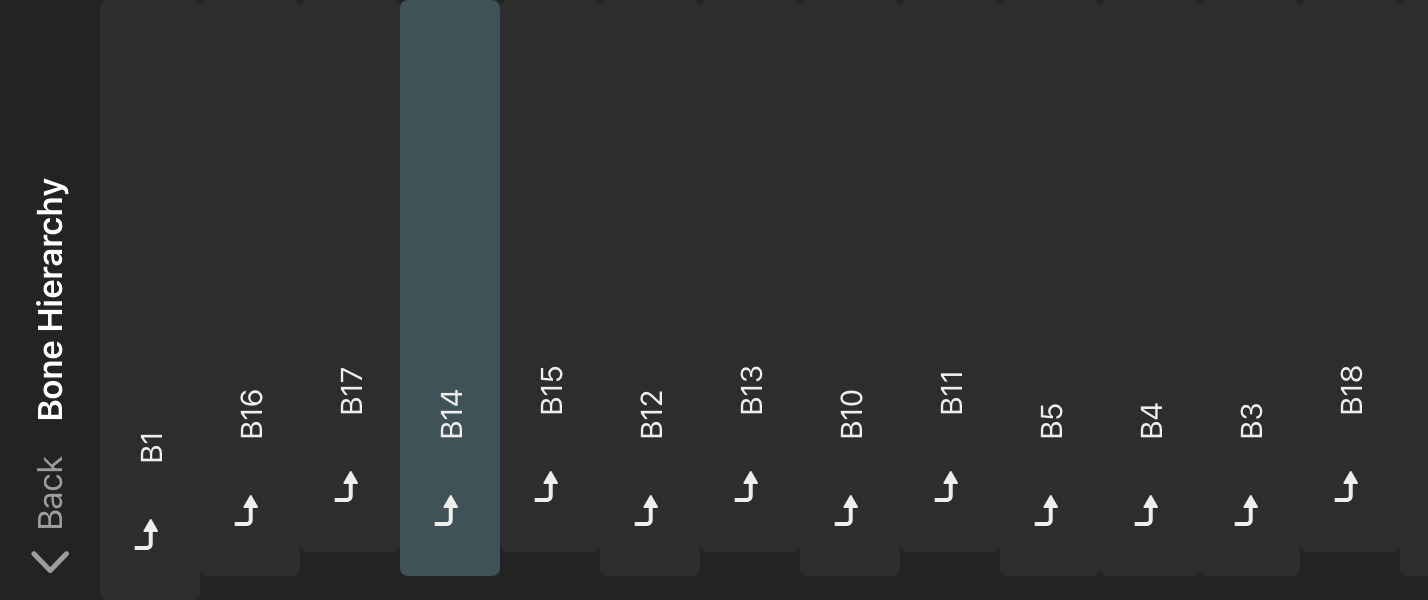
Bones without a parent are not indented in this list. They each form the root of a separate bone hierarchy. Bones with parents are shown below their parent bone and are indented. The order of multiple bones with the same parent bone in this list is arbitrary and has no impact on the hierarchy.
Drag and drop the bones in this list to different positions to edit the hierarchy. If you drop a bone on top of another bone, it becomes a child of the bone you dropped it on. If you drop a bone on the empty space above the list, it gets removed from the hierarchy it is in and becomes a root bone.
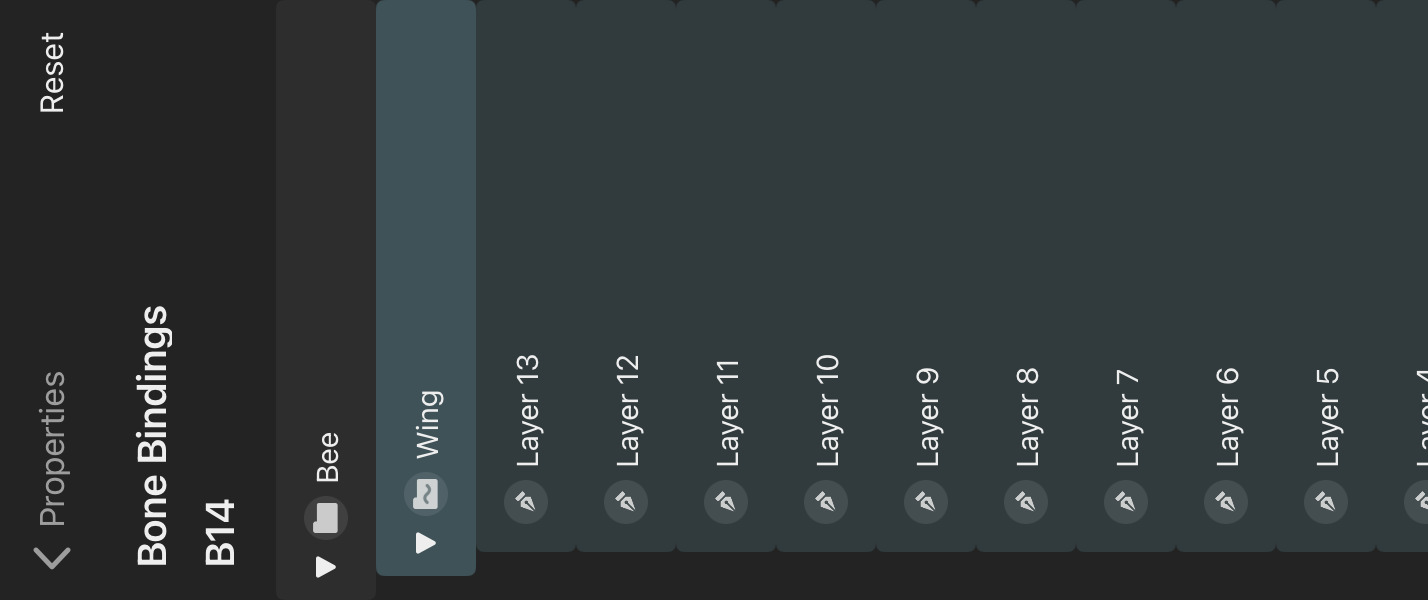
Bone Bindings#
In addition to editing the custom binding of bones and layers on the canvas, you can also do this in the inspector by tapping on Edit Bone Bindings. Here you can see a list of all layers that the selected bone can be manually bound to. Tap on a layer to bind or unbind it from the selected bone.
Layers that are bound to the selected bone are highlighted in the list. Manually bound layers have a stronger highlight. Automatically bound layers have a more faint highlight.
Use the reset button at the top to reset the manual bindings of the selected bone.
Vector Skinning Mode#
The vector skinning mode of a bones effect determines how path control points are influenced by bones. There are different modes:
Smooth#
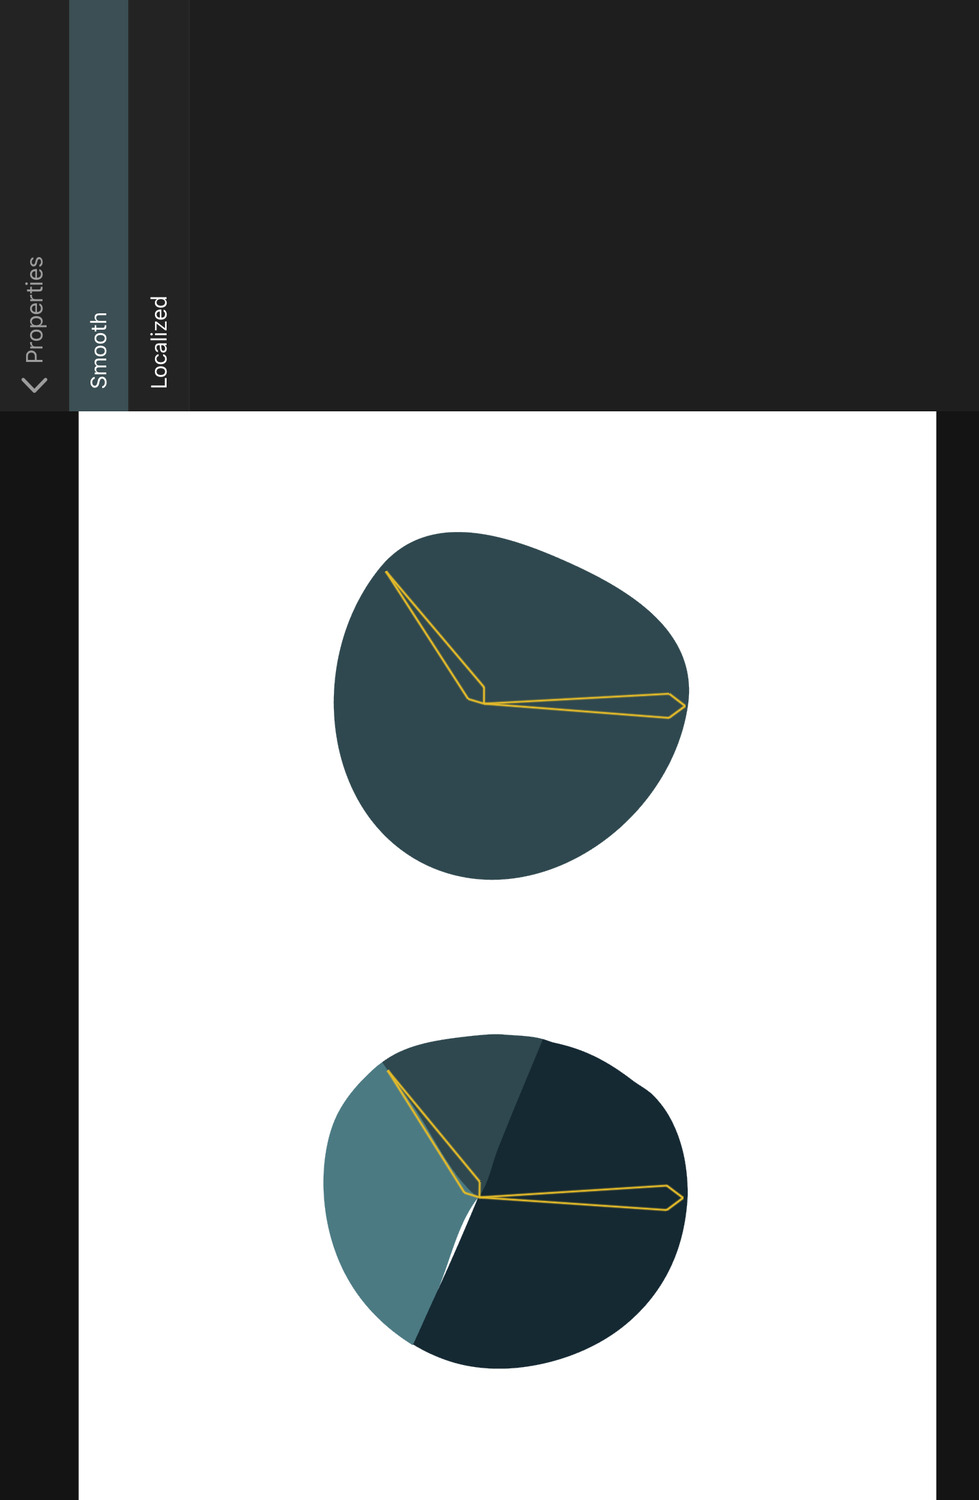
The Smooth skinning mode maintains the angle of the in and out handles of each control point. If the control point mode is Symmetric or Asymmetric and is therefore a smooth transition between two path segments, this transition point will remain smooth when the path is deformed by bones.
This is the default behaviour.
Localized#

The position of the in and out handles of each control point are updated in the same way that the control points themselves are updated by the bones. This can avoid gaps potentially opening up between adjacent path segments of different shapes when their control points and in and out handles overlap, but at the cost of symmetric or asymmetric control points losing their smoothness.
Smooth (Legacy)#
This is an older variant of the Smooth skinning mode and was the default skinning mode for bones effects that were created in ToonSquid versions before version 2.0.15. It is similar to the new Smooth mode, but can cause some unwanted distortions in certain situations, which is why it is only kept for backwards compatibility reasons. It is recommended to switch older rigs to the new Smooth mode, unless your animation relies on the specific behaviour of this legacy mode.
Inverse Kinematics (IK)#
By default, bone hierarchies and layer hierarchies are based on forward kinematics, where the position, rotation and scale of a child depends on the position, rotation and scale of all of its parents in the hierarchy. For example, in a leg hierarchy of upper leg -> lower leg -> foot, moving the upper leg moves the lower leg and the foot and moving the lower leg moves the foot. Moving the foot does not move any of the bones further up the chain.
With forward kinematics, in order for the tip of the last bone in a hierarchy chain to end up at a specific position, you have to manually orient all of the bones in the chain.
With inverse kinematics (IK) on the other hand, you can use a single bone - the IK target - to define where you want the tip of the last bone in a chain to be. The positions and rotations of all of the bones in the chain are then automatically calculated to try to get the tip of the last bone as close as possible to the IK target position. This calculation is also referred to as "solving" the IK chain.
This can be particularly useful for character animation where you can control an entire rig by only animating a few IK target bones.
If the Max IK Stretching property of a bone in an IK chain is above 100%, then this bone is allowed to scale up if necessary to get the end of the bone chain closer to the target.
IK Chains#
An IK chain is a chain of bones that are controlled by inverse kinematics. The last bone in the chain is the bone that has its IK target property set to the IK target bone. The parent bones of this bone are also part of the IK chain if all of the following conditions are true:
- Their direct child is part of the IK chain.
- They only have one child bone whose Ignored by IK property is disabled.
- Their own Ignored by IK property is disabled.
Therefore, by default, bones with multiple children are not part of IK chains. For example, if a torso bone has two leg bone hierarchies with IK targets attached to them, only the leg bones are controlled by their respective IK targets. Since the torso has multiple child bones, it is not part of either IK chain.
Creating IK Chains#
In order to create an IK chain, set the IK Target property of the last bone in the chain to the bone that should act as the IK target.
However, there are some additional rules and recommendations to keep in mind in order to avoid unwanted behaviour and get the best possible results:
- Make sure that the IK target bone is not part of the bone transform hierarchy that is being controlled by the IK target itself. This will otherwise lead to a feedback loop and cause jittering when you try to move the IK target bone. If you have such feedback loops in your rig, ToonSquid will show a warning in the inspector.
- Generally, you don't want the IK target bones to have any direct influence on the layer contents, so they effectively only act as control handles for the other bones in the rig. Those bones then deform the layer contents. Therefore, you'll usually want to set the Strength property of the IK target bones to 0.
- It is important to understand that the solutions of IK chains on any given frame of your animation don't depend on the IK solution on other frames. Given that there can often be multiple valid solutions for the bones in an IK chain, this can lead to bones jumping from one valid solution to a rather different solution between different frames. This can happen particularly frequently when the bones in a chain are all placed in a straight line in the bind pose. If you manually rotate the bones in the chain, either in the bind pose or using keyframes, you can nudge the IK chain towards a specific solution and get more consistent animations.
- Rotation limits are taken into account when IK chains are solved, however, they can also negatively impact the quality of the solution. Consider reducing the number of rotation limits in a chain if you are having trouble getting the desired results.
No search results