Effects
Effects
Effects are a powerful tool in ToonSquid that allow you to modify the visual appearance of your layers. They can be used to create simple adjustments like changing the brightness of a layer or more complex effects like creating a bone rig for a character.
Effects in ToonSquid are nondestructive by default, meaning that you can always go back and change the settings of an effect, temporarily disable it or remove it entirely without losing any of your original layer content.
Add Effects#
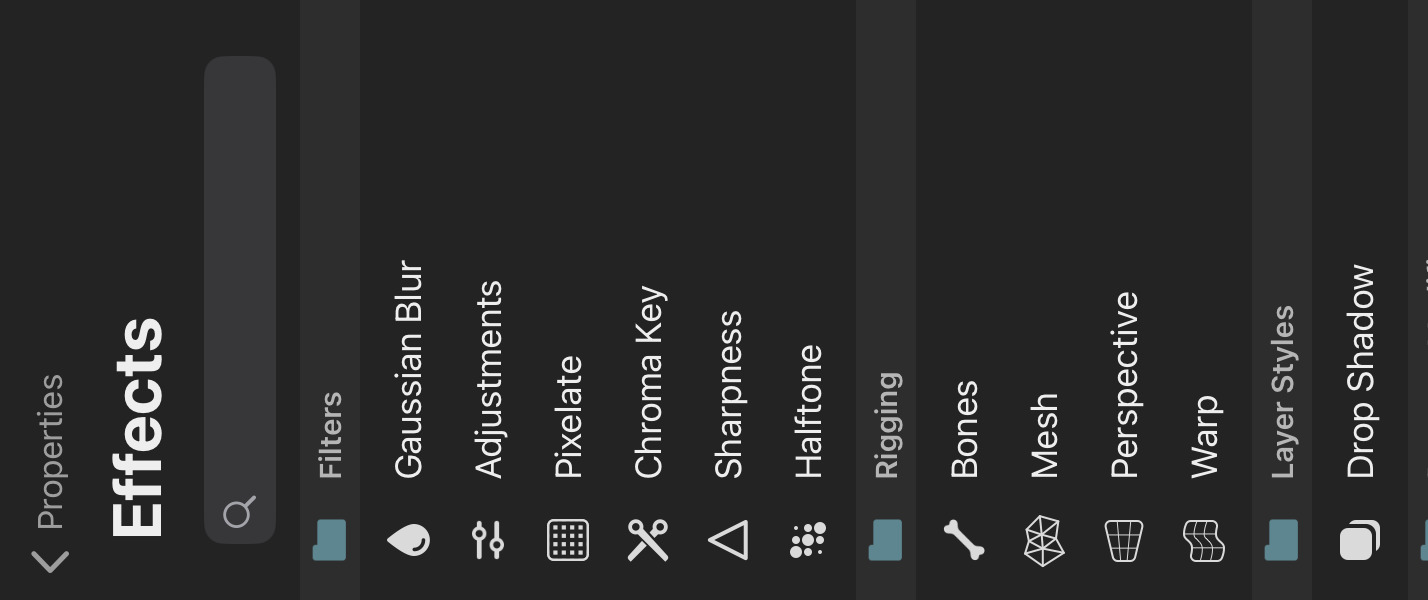
Effects can be added to every layer in ToonSquid. To add an effect:
- Open the inspector.
- Tap the
+button in the effects section.

- Select the effect you want to add.
After you have added effects to your layer, they appear in the effects list in the inspector. With a few exceptions such as bones, most effects can be added multiple times to the same layer.
Search#
You can search for effects by typing into the search field at the top of the effects list.
Effects Order#
In general, the order of effects in the effects list matters. Most of the effects are applied to the layer from top to bottom, meaning that the effect at the top of the list is applied first and the effect at the bottom is applied last.
This gives you a lot of flexibility and control over the final appearance of your layer. Here is an example of a pixel layer with a Gaussian Blur followed by a Pixelate effect:
Here is the same layer with the Pixelate effect first and the Gaussian Blur effect second:
However, there are also exceptions to this common effect order behaviour.
Exceptions
- The order of the Bones effect in the effects list does not matter.
- The order of the Parallax effect in the effects list does not matter.
- All other effects in the
Property Modifierscategory are applied before the effects in other effect categories. Relative to one another, these property modifier effects are still applied in the order they appear in the effects list.
Visibility#
You can toggle the visibility of individual effects by tapping the eye icon next to the effect name in the effects list. Disabling the visiblity of an effect using this button also hides the effect in the export.

FX Button#
If the current scene contains any effects, you can use the FX button to view your animation with or without effects in the editor. This does not affect the export of your animation. All effects that haven't had their individual visibility manually turned off are visible in the export.
Many tools (e.g. the brush tool or the selection tool) automatically disable effects when you switch to them, since they edit the state of the layer contents before effects are applied to them.
Certain tools such as the transform bones tool or the transform mesh tool behave differently depending on whether effects are enabled or not. You can find more details about this on the corresponding handbook pages.
Note#
If a symbol layer references a clip that uses effects on any of its layers, the symbol will always display the clip with all of its effects enabled, no matter whether the
FXbutton is enabled or not.
Selecting and Deselecting Effects#
Effects can be selected by tapping on their name in the effects list, in the same way that you would select a layer in the layer list.
In order to deselect an effect, you can either:
- Tap the selected effect and and choose the
Deselectaction, or - Swipe the selected effect to the right and let go.
Similarly to layers, you can add more effects to the selection by swiping each one to the right and letting go.
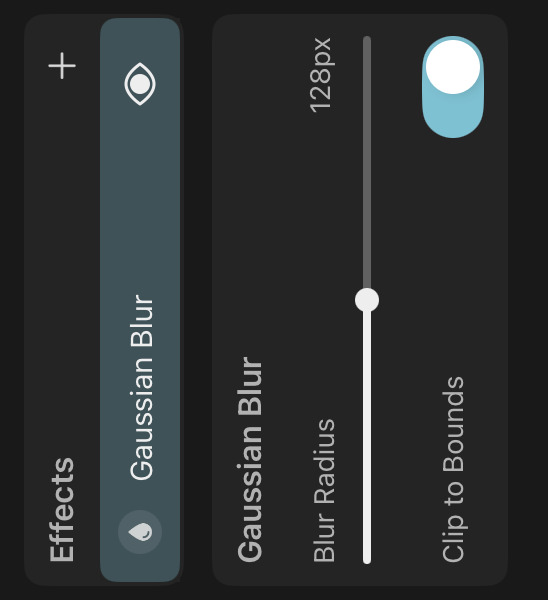
Effect Properties#
When an effect is selected, its properties are shown in the inspector instead of the layer properties.
Keyframes#
Just like with layers, effect properties can be animated using keyframes.

When a layer has effects, the names of the layer and effects are also shown in the timeline above their respective properties. You can tap this name of the layer or effect to quickly select all of its properties.
Effect Actions#
Tap the selected effect again to see a list of actions that you can perform on this effect.
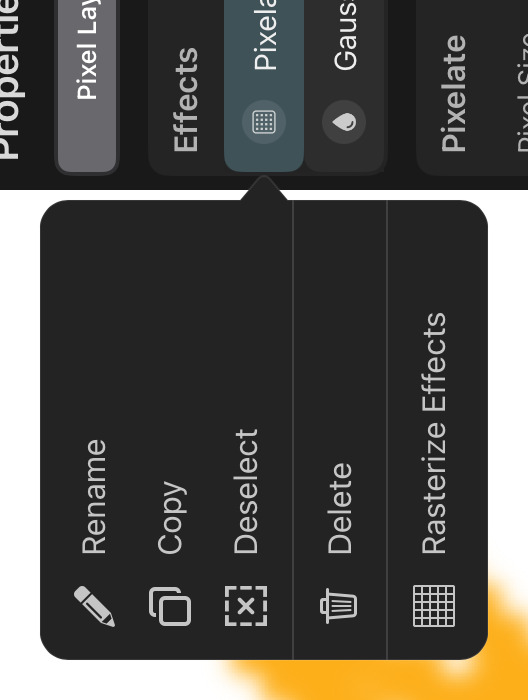
Rename#
Use this option to change the name of the effect.
Copy and Paste#
Use these options to copy and paste effects from one layer to another.
Deselect#
Deselects the effect.
Delete#
Deletes the effect and removes it from the layer.
Tip#
You can also delete the selected effect using the
Quick Deletebutton in the sidebar. Alternatively, swipe the effect to the left and chooseDelete.
Rasterize Effects#
Rasterizes the layer with all of its effects applied - turning it into a pixel layer.
Rasterizing effects is a destructive operation, meaning that you can't go back and change the settings of the effects after you have rasterized them. All keyframes of the effect are lost during rasterization.
Render Quality#
The quality with which effects are rendered both in the editor and in the export can be adjusted in the settings. Consider temporarily switching to a lower quality setting if you run into performance issues in the editor when working with many effects.
Vector Contents#
Layers with resolution-independent vector contents such as vector layers and path layers need to be implicitly rasterized when certain effects are applied to them. This kind of implicit rasterization is automatically performed by ToonSquid when the layer with the effect is displayed. It is not a destructive operation and the original vector contents are still editable, however, when you zoom into the layer, you will notice individual pixels around the edges of the vector shapes. The resolution of this kind of implicit rasterization is also affected by the render quality setting.
No search results